快速开始
本页带你启动网关并登录操作页面。已经能打开网关的用户,可以直接跳到登录 GatewayRuntime。
下载安装包
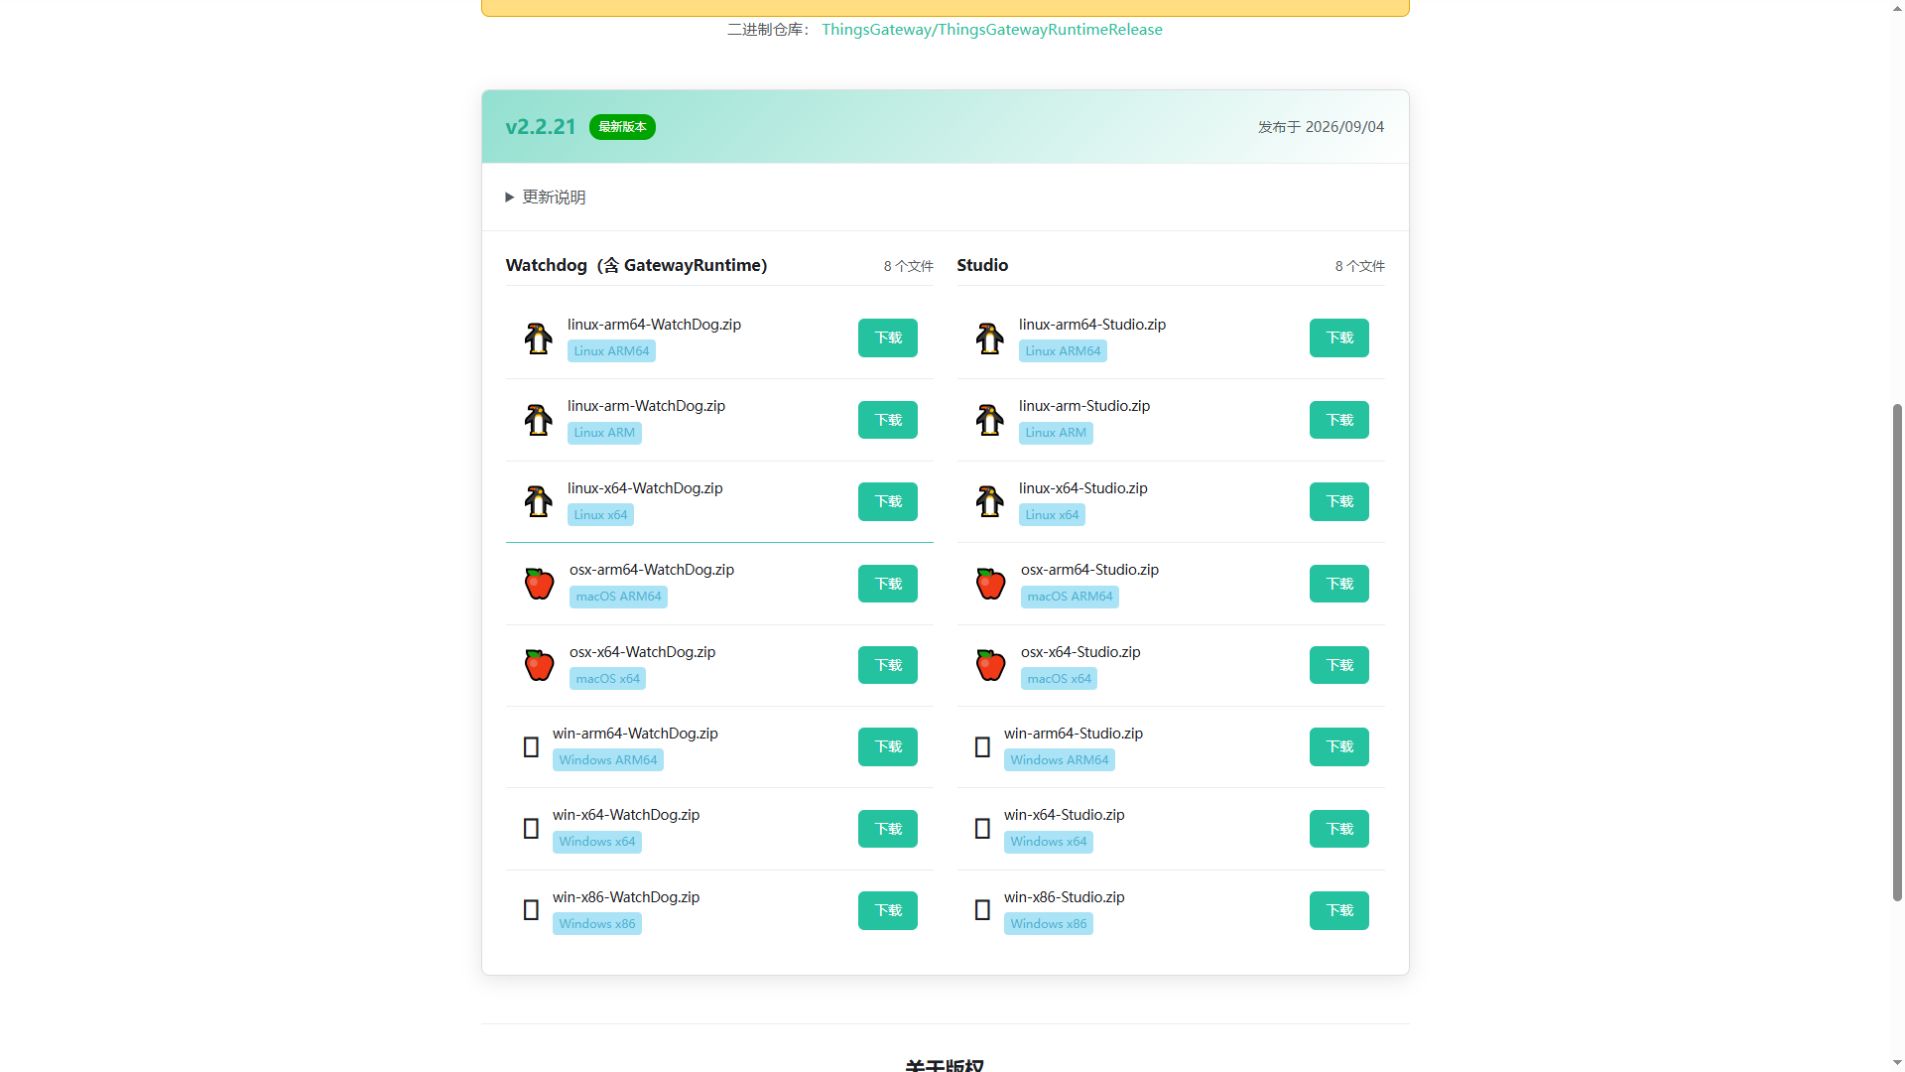
- 打开下载中心,找到 Watchdog(含 GatewayRuntime) 一栏,不要下载右侧的 Studio 工具包。
- 按网关电脑的系统和处理器选择文件,点击该行“下载”。例如 Windows x64 选
win-x64-WatchDog.zip,Linux x64 选linux-x64-WatchDog.zip。Windows 可在“设置 → 系统 → 系统信息”查看系统类型;Linux 可运行uname -m,其中x86_64对应 x64,aarch64对应 ARM64。 - 解压到一个固定目录,保留包内所有文件和目录,不要只复制可执行文件。
- 普通发布包需要 .NET 10 Runtime,Watchdog 还需要 ASP.NET Core Runtime;下载中心提供对应入口。独立运行或 AOT 包不需要另外安装 .NET Runtime。
Watchdog 负责启动和守护 GatewayRuntime。配置采集、转发、报警时使用 GatewayRuntime 页面;管理进程和项目包时使用 Watchdog 页面。普通网关运行不需要安装 Studio。
启动网关
以下路径只是示例,请换成实际解压目录。首次先直接启动,成功后再设置开机自启动。
Windows
- 右键 Windows 开始菜单,选择“终端(管理员)”或“Windows PowerShell(管理员)”,在系统提示中确认授权。运行包需要管理员权限;普通窗口可能提示“请求的操作需要提升”。
- 运行:
# 从完整的发布目录启动 Watchdog,不单独移动可执行文件。
Set-Location 'D:\ThingsGateway\WatchDog'
.\ThingsGatewayRuntime.Watchdog.exe
- 保持程序运行,打开
http://localhost:6200。从另一台电脑访问时,将localhost换成网关 IP。 - 登录 Watchdog,在“仪表盘”查看 GatewayRuntime 是否正在运行。账号说明见下面“Watchdog 登录”。
Linux
- 打开终端,进入解压后的 WatchDog 目录。
- 运行:
# 路径替换为实际安装目录,运行账号应具有目录读写权限。
cd /opt/ThingsGateway/WatchDog
chmod +x ThingsGatewayRuntime.Watchdog
./ThingsGatewayRuntime.Watchdog
- 保持程序运行,在浏览器打开
http://<网关IP>:6200。 - 登录 Watchdog,在“仪表盘”查看 GatewayRuntime 是否正在运行。
Watchdog 登录
未更改的随包默认账号为 admin、密码为 111111;交付方已设置账号时使用交付账号。Watchdog 和 Runtime 分别管理登录凭据,修改一边的密码不会自动修改另一边。
如果页面显示首次初始化,而不是普通登录,请由安装人员在网关电脑上读取 Watchdog 目录下 Data/watchdog_bootstrap.token,在初始化页面填写该令牌并设置新的管理员密码。初始化完成后使用 admin 和新密码登录,不要把令牌发到公开聊天或截图中。
Watchdog 默认启动 GatewayApp 中的 GatewayRuntime,首次空项目也可以在 Runtime Web 中直接配置点位,不要求先用 Studio 建工程。若日志提示找不到网关程序,检查运行包是否完整。已有工程需要恢复时,再去“项目管理”上传并应用项目包,见上传与应用项目。
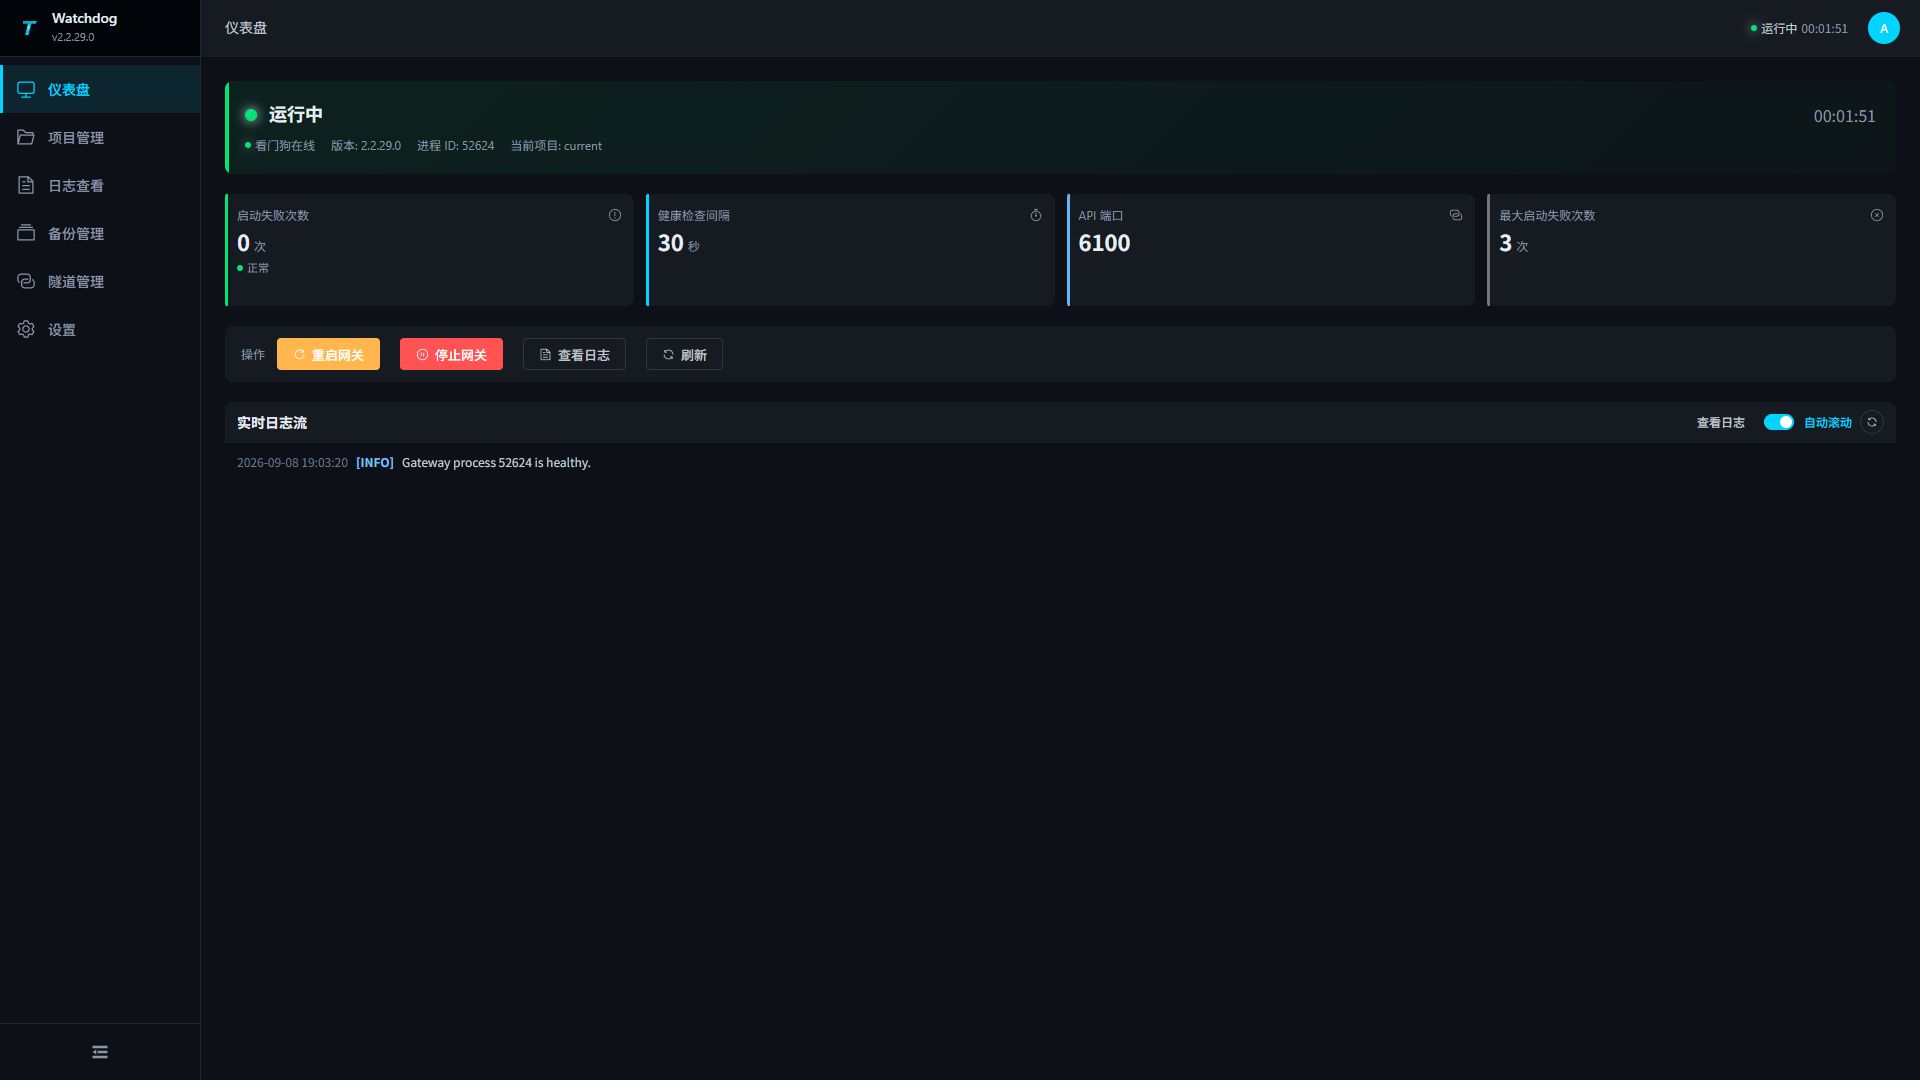
仪表盘显示“运行中”,日志出现进程健康信息后,再打开 Runtime 登录页面。下图中的 API 端口为 6100:
登录 GatewayRuntime
- 打开
http://<网关IP>:6100。网关与浏览器在同一台电脑时可用http://localhost:6100。 - 输入账号和密码,点击“登录”。随包默认账号为
admin,密码为111111;如果交付方已修改,请使用交付账号。 - 登录后进入“系统总览”。

首次使用默认账号登录后,应修改默认密码。不要把默认账号的网关直接暴露到公网。
新工程没有设备和点位时,列表为空是正常的,不需要先去检查离线设备或转发目标。接下来完成采集第一个点,或进入操作手册选择任务。
打不开页面时
| 现象 | 先做什么 |
|---|---|
| Watchdog 页面打不开 | 确认 Watchdog 程序仍在运行,核对 IP 和 6200 端口。远程访问还需检查防火墙。 |
| Watchdog 能打开,Runtime 打不开 | 在 Watchdog 仪表盘查看网关状态和启动日志,确认 GatewayApp 完整以及 6100 端口未被占用。 |
| 本机能打开,别的电脑打不开 | 使用网关实际 IP,而不是另一台电脑上的 localhost;检查网络和防火墙。 |
| 账号密码不正确 | 确认使用的是当前网关账号,检查是否已由交付方修改。不要反复尝试大量密码。 |
端口经过修改时,以上地址也要使用实际端口。
开机自动启动
直接启动并能正常登录后,再按系统设置服务。执行服务操作前先关闭本次直接启动的 Watchdog,避免两个进程使用同一端口。
Windows:安装为服务
以管理员身份打开 PowerShell,修改实际路径后执行:
# 服务直接指向完整发布目录中的 Watchdog 程序。
$watchdogExe = 'D:\ThingsGateway\WatchDog\ThingsGatewayRuntime.Watchdog.exe'
sc.exe create ThingsGatewayWatchdog binPath= "`"$watchdogExe`"" start= auto DisplayName= "ThingsGateway Watchdog"
sc.exe start ThingsGatewayWatchdog
Get-Service ThingsGatewayWatchdog
状态应为 Running,再打开 Watchdog 与 Runtime 页面确认可以访问。若失败,检查程序路径、运行账号的目录权限和 Windows 事件查看器。
Linux:安装为 systemd 服务
在 /etc/systemd/system/thingsgateway-watchdog.service 中填写:
[Unit]
Description=ThingsGateway Watchdog
After=network.target

[Service]
Type=simple
User=thingsgateway
WorkingDirectory=/opt/ThingsGateway/WatchDog
ExecStart=/opt/ThingsGateway/WatchDog/ThingsGatewayRuntime.Watchdog
Restart=always
RestartSec=10

[Install]
WantedBy=multi-user.target
User 必须换成已存在的运行账号;工作目录和执行路径也要换成实际路径。该账号需要发布目录和项目目录的读写权限。
# 重新加载服务配置并设为开机启动。
sudo systemctl daemon-reload
sudo systemctl enable thingsgateway-watchdog
sudo systemctl start thingsgateway-watchdog
sudo systemctl status thingsgateway-watchdog
状态应为 active (running),再打开 Watchdog 与 Runtime 页面确认可以访问。