Alarm Query
The alarm query page includes two tabs: "Real-time Alarm" and "Historical Alarm." Real-time alarms handle alarms that have not been restored or acknowledged, while historical alarms query alarm records that have already been written to historical storage.
To send an email when an alarm is generated, first enable alarms on the variable, then connect the "Alarm Notification Rule" and "Email Push" nodes in the rule engine. Mail server parameters are not maintained under "System Settings → Alarm Configuration." For the complete procedure, see Alarm Configuration and Email Notifications.
First Look at Terms
| Terms | On-site Understanding |
|---|---|
| Real-Time Alarms | Incidents that still require personnel attention may not have recovered or been confirmed, or may remain pending confirmation even after restoration. |
| Historical alarms | alarm records written to historical storage, used for traceability, export, shift reports, or accident analysis. |
| Alarm / Recovery | Alarm indicates that the condition has been triggered; Recovery means the variable value returns to the allowed range or the trigger condition disappears. |
| Confirm that the alarm | personnel are aware and have recorded the handling status does not mean the on-site fault has disappeared. |
| HH / H / L / LL | High-high, high-low, low-low limits. HH and LL are usually more severe than H and L. |
| Suppression Conditions | No alarms when certain conditions are met, such as equipment shutdown, maintenance, or interlock not met. |
| Alarm Recovery Configuration | Whether the alarm is automatically removed from the real-time alarm list after recovery must be set according to the on-site duty process. |
On-site Handling Process
The alarm page is used for confirmation and tracing of alarms, and does not directly replace on-site handling. When duty or commissioning personnel see the alarm, it is recommended to handle it in the following order.
| Sequence | Operation | Purpose |
|---|---|---|
| 1 | View real-time alarm devices, variables, alarm values, limits, and alarm times. | Determine the source and severity of the alarm. |
| 2 | Confirm the actual status of the equipment on site or in the upper-level system. | Eliminate communication anomalies, range errors, or false alarms. |
| 3 | Handle process or equipment issues according to on-site procedures. | Address on-site risks first, then system records. |
| 4 | Confirm the alarm on the alarm page and fill out the confirmation instructions. | Leave the handler, the processing time, and the handling conclusion. |
| 5 | When retrospective, enter the historical alarm query and export. | Used for class reports, accident analysis, or delivery archives. |
"Confirm alarm" means the person has known and recorded the action, but does not mean the alarm condition has disappeared. Whether an alarm is restored depends on variable values, alarm thresholds, suppression conditions, and alarm recovery configuration.
Function Entry
Click the left menu "Data and Alarm → Alarm Query" to enter the page.
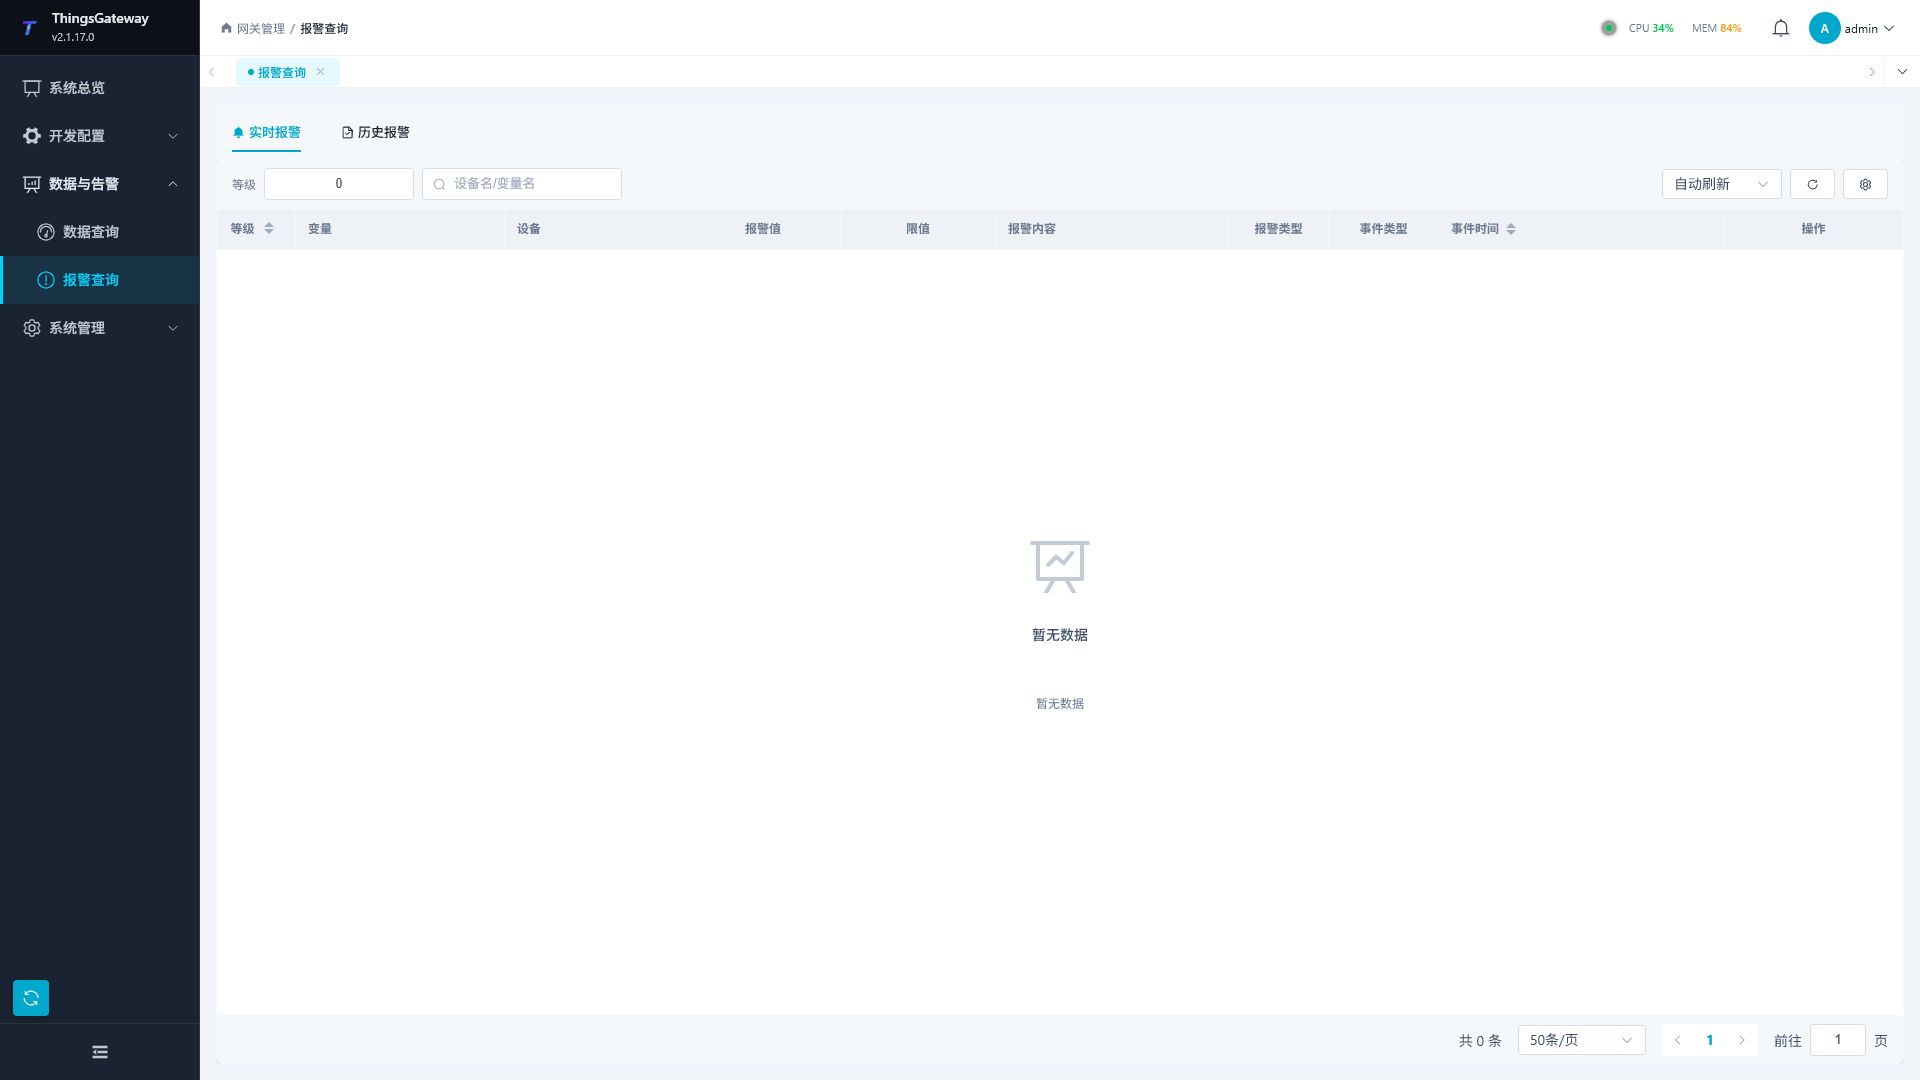
Alarm List
| Columns | Descriptions |
|---|---|
| Level | Alarm Level (with color tags; level 4 and above is red, Level 3 is orange) |
| Equipment | Name of Alarm Device |
| Variable | Alarm Variable Name |
| Alarm Content | Description of the Alarm's Specific Content, prioritizing the alarm text in the variable configuration. |
| Alarm Value | Variable Value When Alarm Is Triggered |
| Limit | Alarm Threshold |
| Alarm Time | Alarm Occurrence Time |
| Event Type | Alarm/Recovery (with color tag, alarm is red, recovery is green) |
| Alarm Type | Alarm Type (High/High/Low/Low/On/Off/Custom) |
| Confirmation Time | Alarm Confirmation Time, displays the "Not Confirmed" label when not confirmed |
Alarm Type Description
| Type | Description |
|---|---|
| HH (high) | value exceeding the high limit triggers more severe than the high limit, usually indicating an emergency. |
| H(high) | value exceeding the high limit triggers abnormal elevation |
| L (low) | value triggered below the low limit indicates abnormal low |
| LL (low) | value triggered below the low limit is more severe than the low limit and usually indicates an emergency |
| alarm activation | alarm triggered when Boolean is on |
| Off alarm | Alarm triggered when Boolean is turned off |
| Custom alarm | Triggered alarm according to custom conditions in variable configuration |
Alarm delay (ms) can be set to how long the alarm lasts before triggering to avoid momentary fluctuations causing false alarms.
Operation Functions
| Functions | Description |
|---|---|
| Refresh | Manually refresh alarm list (requires permission) |
| Automatic refresh | Selectable options: 1 second,10 seconds,30 seconds, 1-minute refresh interval, or automatic refresh can be paused and then manually handled by alarm. |
| Alarm Level Filtering | Filtering current alarms by alarm level. The higher the level value, the more severe the condition usually is. |
| Keyword Search | Search for alarms by variable name, device name, or alarm text. |
| Column Settings | Custom alarm list display fields. When checking alarm sources, register addresses, data types, remarks fields, and more can be displayed. |
| Details | View alarm details (permission required) |
| Confirm | Confirm unconfirmed alarm events. |
Alarm Confirmation
Click the "Confirm" button to confirm the alarm. An input box will pop up during confirmation, where you can enter the confirmation instructions:
The confirmation button is only displayed when there are unconfirmed alarm events in the real-time alarm list. Confirmation operations record the confirmer, confirmation time, and confirmation instructions, and will not directly clear alarms; Whether the alarm is restored still depends on variable values and alarm conditions.
Confirm Configuration
| Field | Description |
|---|---|
| Confirmation Instructions | Optional, enter the remarks for alarm confirmation |
Entering confirmation instructions can help with subsequent alarm handling; it is recommended to fill in the action or reason description. The confirmation alarm only marks the alarm as known and will not cancel it. The alarm automatically returns to the recovery state once the variable value returns to normal.
Alarm Details
Click the "Details" button to open the alarm details drawer, displaying the full alarm information in a partitioned format:
The details drawer is organized into fields such as "Basic Information, Alarm Information, Variable Information, Time Information, Confirmation Information," suitable for checking alarm sources and trigger thresholds , recovery time, and confirmation of processing records.
| Partition | Main Content |
|---|---|
| Basic Information | Alarm ID, variable name, device name, description. |
| Alarm Information | Alarm level, alarm type, event type, alarm value, limit value, alarm text. |
| Variable Information | Data type, unit, variable address, and current variable state. |
| Time Information | Alarm time, recovery time, duration of alarm. |
| Confirmation Information | Confirmation status, confirmation person, confirmation time, confirmation explanation. |
Alarm Configuration and Email Notifications
Email notifications are jointly handled by variable alarms and the rule engine, with the processing process as follows:
"System Settings → Alarm Configuration" only controls whether alarms are removed from the real-time alarm list after recovery; SMTP servers are not configured, nor will emails be sent automatically.
Step 1: Enable alarms for variables
- Click Development Configuration → Collection Configuration and select the target variable from the persistent variable list.
- Find the variable you want to monitor, click "Edit," then switch to the "Alarm Configuration" tab.
- Enable Boolean alarms, limit alarms, or custom alarms according to variable data types, and fill in alarm text, alarm level, alarm delay, and suppression expression.
- Save the variable and confirm that the variable, its affiliated device, and acquisition channel are all enabled.
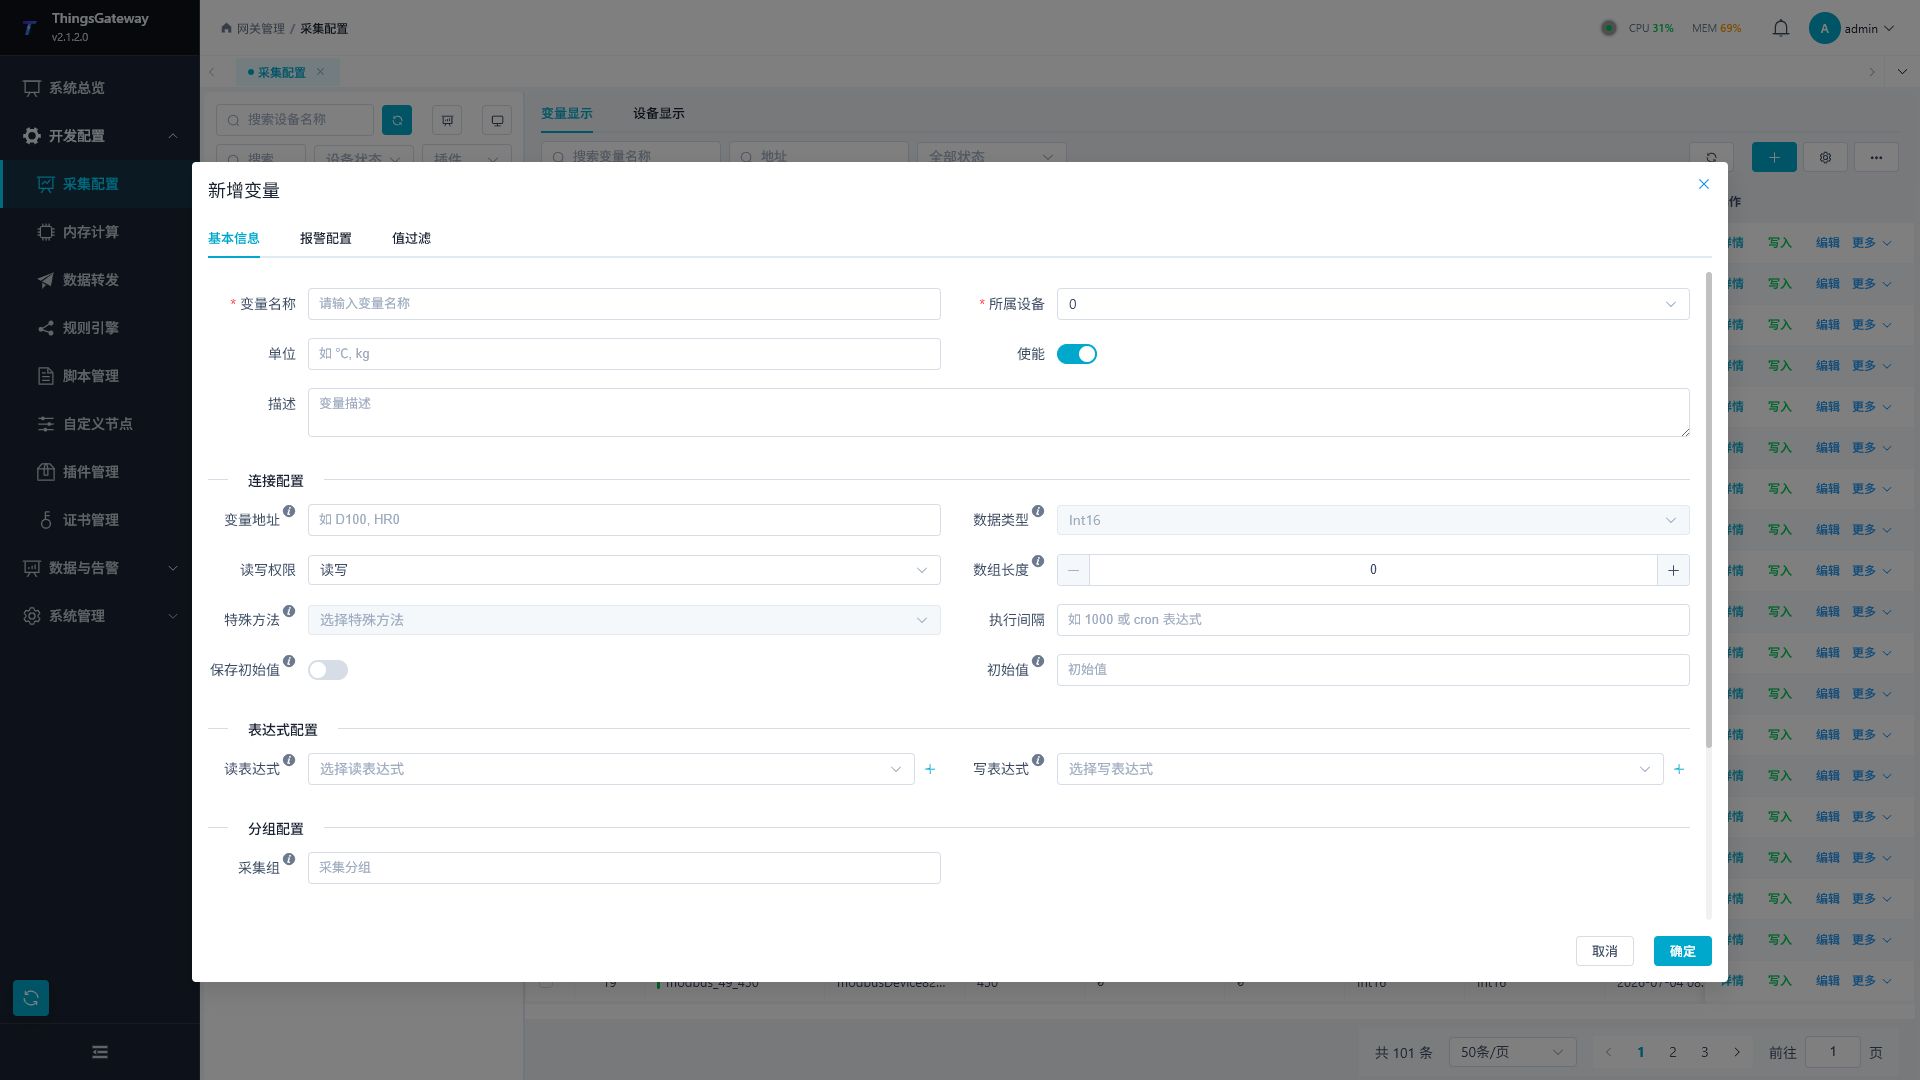
| Configuration Items | Description |
|---|---|
| Boolean alert / Boolean off alarm | Alarm occurs when the Boolean variable is in an open or closed state. |
| High, high, low, low-low alarms | Alarms occur when numerical variables exceed the corresponding limits; When multiple limits are enabled simultaneously, they should meet the conditions of "High High > High > Low > Low Low." |
| Custom alarms | Use expressions to determine alarm conditions, suitable for status codes or combination conditions. |
| Alarm Text | AlarmText in emails, it is recommended to specify the object, exception conditions, and handling direction. |
| Alarm Levels | range from 0 to 10; higher values indicate more serious issues; Can be filtered by email notification rules. |
| Alarm delay | Alarm only occurs after the alarm condition has been continuously reached for this time, measured in milliseconds; Used to filter transient shaking. |
| Suppression Expressions | No corresponding alarms are generated when the expression is established, suitable for maintenance, shutdown, or interlock scenarios. |
For details about variable alarm fields, see Alarm Configuration in Collection Configuration.
Step 2: Create an email notification rule stream
- Click the left menu "Develop Configuration → Rule Engine" to create a new rule stream or open an existing rule stream.
- Drag the "Alarm Notification Rules" node from the "Triggers" category on the left node panel.
- Drag the "Data Push" category into the "Email Push" node.
- Connect the
FilteredAlarmDataoutput of the "Alert Notification Rule" to theDatainput of the "Mail Push". - Select two nodes separately and fill in the filter conditions and SMTP parameters.
- Save the rule stream and confirm that both the rule stream and both nodes are enabled.
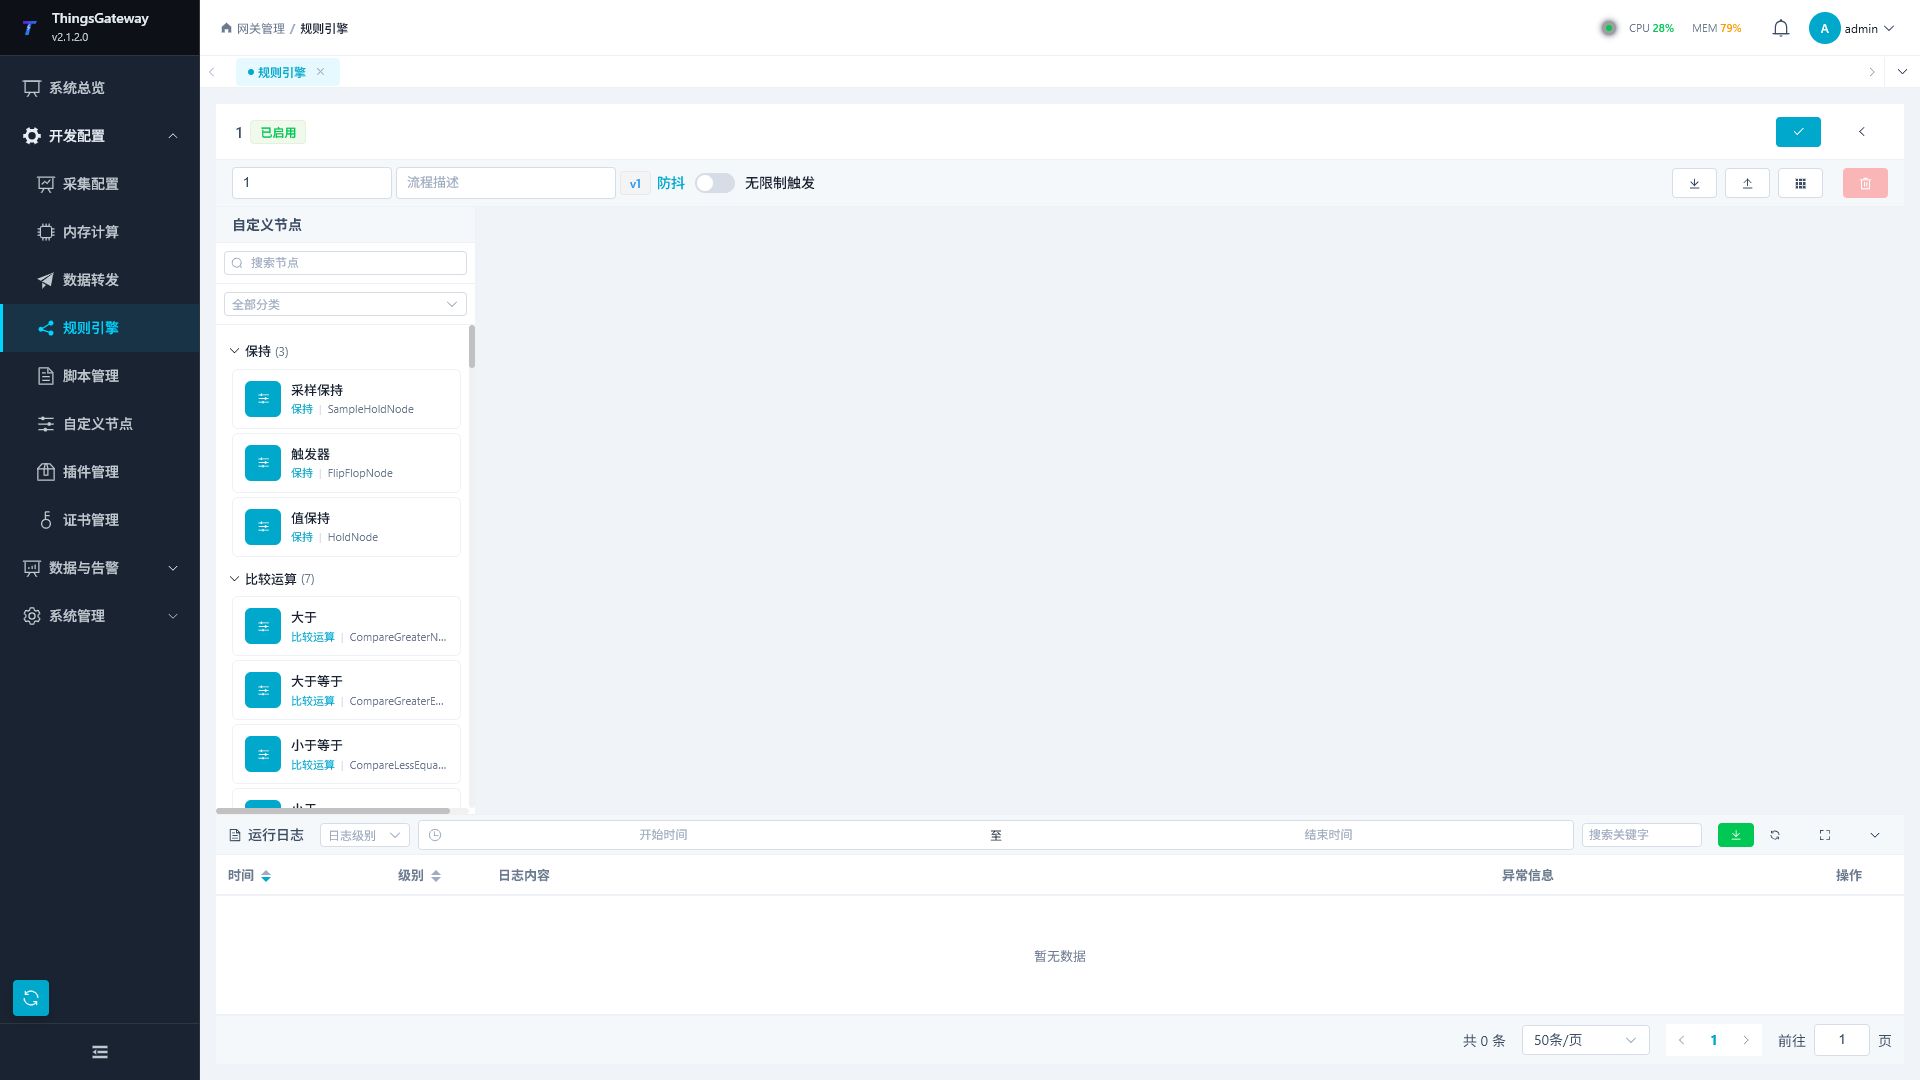
"Alarm notification rules" will actively subscribe to alarm change events, eliminating the need to connect to variable input nodes. Only alarm data that passes filtering will be output from FilteredAlarmData and trigger subsequent email pushes.
Alarm notification rule parameter
| parameter | Description |
|---|---|
| Minimum alarm level | Only forwards alarms greater than or equal to that level. Filling in 0 indicates that filtering is not by level. |
| Equipment Name | Accurately match equipment name; Multiple names are separated by English commas, leaving blanks to indicate all devices. |
| Event Types | Multiple types are separated by English commas. Only send alarm generated emails, fill in Alarm; When sending a recovery email, enter Alarm,Finish. Leaving a blank will match all alarm lifecycle events. |
| Alarm Types | Can be filled in: Open,Close,HH,H,L,LL, Custom, multiple types separated by English commas; Leave blank to indicate all types. |
| Stabilization interval | The same device and variable only notify once within this time, in milliseconds; Fill in 0 indicates no stabilization. |
| After enabling | and turning it off, nodes no longer output alarm data. |
For production environments, it is recommended to at least fill in the "Event Type." If you only want notifications when an alarm occurs, please fill in Alarm; When you don't need to restore or confirm emails, don't leave them blank. For points that may experience frequent jitter, variable alarm delay or node anti-shake intervals should also be configured.
Email push parameters
| Parameters | Description |
|---|---|
| SMTP server address | SMTP hostname provided by your mail service provider, such as the SMTP address for a business email. Do not enter the webmail login URL. |
| SMTP server port | to fill in according to the email service provider's requirements; when enabling STARTTLS, the commonly used 587. The firewall must allow the gateway to access this port. |
| Enable SSL | enable when the mail server requests encrypted connections; It must match the requirements of the server port and service provider. |
| SMTP username | SMTP verified account, usually a full email address. |
| SMTP password | SMTP authorization code or dedicated password provided by the email service provider, which may not necessarily be a web login password. |
| Sender Address | The sender address shown in the email. Most service providers require it to match the SMTP verified account. |
| Sender Name | The sender name seen by the recipient, such as ThingsGateway or the on-site name. |
| Recipient Address | Multiple addresses separated by English commas. Before saving, check for empty addresses or Chinese commas. |
| Email subject template | Supports {{property-name}} placeholders, such as [{{EventType}}] {{DeviceName}} - {{Name}}. |
| Email body template | supports the same placeholder; When the main text starts with <, send as an HTML email; otherwise, send as plain text. |
| Enable | After turning it off, no emails are sent, but node parameters can still be retained. |
| Push Data | Connect to the FilteredAlarmData output of the "Alarm Notification Rule"; manual filling is not required. |
Common template variables are as follows. Variable names should correspond to {{Name}}, not {{VariableName}}; Non-existent properties will be replaced with empty strings.
| Template Variable | Content |
|---|---|
{{DeviceName}} | Equipment name. |
{{Name}} | Variable name. |
{{Description}} | Variable description. |
{{AlarmLevel}} | Alarm level. |
{{EventType}} | Event types, such as Alarm,Finish, Confirm. |
{{AlarmType}} | alarm types, such as HH,H,Open, Custom. |
{{AlarmText}} | Alarm text in variable alarm configuration. |
{{AlarmCode}} | Variable values when an alarm is triggered. |
{{AlarmLimit}} | Alarm limit or custom alarm conditions. |
{{AlarmTime}} | Alarm generation time. |
{{EventTime}} | The current timing of the alarm lifecycle event. |
{{FinishTime}} | Alarm recovery time. |
{{ConfirmTime}} | Alarm confirmation time. |
{{ConfirmText}} | Instructions for Alarm Confirmation. |
{{Remark1}} to {{Remark5}} | variable custom note fields. |
Theme template example:
[{{EventType}}] {{DeviceName}} - {{Name}} - Level{{AlarmLevel}}
Plain text template example:
Equipment:{{DeviceName}}
Variable:{{Name}}
Event:{{EventType}}
Type:{{AlarmType}}
Level:{{AlarmLevel}}
Alarm value:{{AlarmCode}}
Limit:{{AlarmLimit}}
Contents:{{AlarmText}}
Alarm time:{{AlarmTime}}
Verification Email Notification
Before official use, a full verification should be completed in a test variable or secure debugging environment.
- Save and enable the rule stream, confirming that the rule flow page is free of configuration errors.
- Let the test variable bypass the alarm condition and maintain the alarm delay until it exceeds the variable's alarm delay.
- In "Data and Alarm → Alarm Query → Real-Time Alarm," confirm that the corresponding alarm has been generated.
- Return the rule stream, select "Alarm Notification Rules," and confirm that
FilteredAlarmDatahas output alarm data. - Select "Email Push" and check
Success,ErrorMessage, andLastPushTime.Successistruemeans the SMTP server has accepted this send. - Go to your inbox to confirm the subject, body, and time are correct, and also check your spam folder.
- If recovery notifications are configured to restore variables to normal, only the expected
Finishemails are generated.
Do not expose SMTP authorization codes in documents, screenshots, runlogs, or issue feedback. Before taking screenshots, the "SMTP password" should be covered. The production environment should use a dedicated sending account, with restrictions on the permissions and scope of the recipient.
Common Problems
| Phenomena | Troubleshooting Methods |
|---|---|
| No alarm occurred | Check whether variables, devices, and channels are enabled, and whether alarm conditions, alarm delay, and suppression expressions are met. |
FilteredAlarmData No output | Checks minimum alarm level, device name, event type, and alarm type; Name matching distinguishes the actual string; multiple values must use an English comma. |
| SMTP authentication failure | confirm that SMTP service has been enabled in the email backend, using an authorization code or dedicated password; Verify username and sender address. |
| Connection timeout or TLS failure | Check DNS, gateway, network and firewall ports on SMTP hosts, and confirm that the port matches the "SSL enabled" settings. |
| Sender rejected | Change the sender's address to one permitted by the SMTP account, or configure dropshipping permissions in the mail service backend. |
| Receive multiple duplicate emails | Restrict event types to Alarm and set alarm delay or anti-shake intervals; At the same time, confirm that no multiple enabled rule streams are handling the same alarm. |
Success is true but no mail in the inbox | Check spam, mail gateway policies, recipient addresses, and service provider drop logs. |
Historical Alarms
The historical alarm tab is used to query alarm records that have been stored in the database by historical alarm target, alarm level, keyword, and time range.
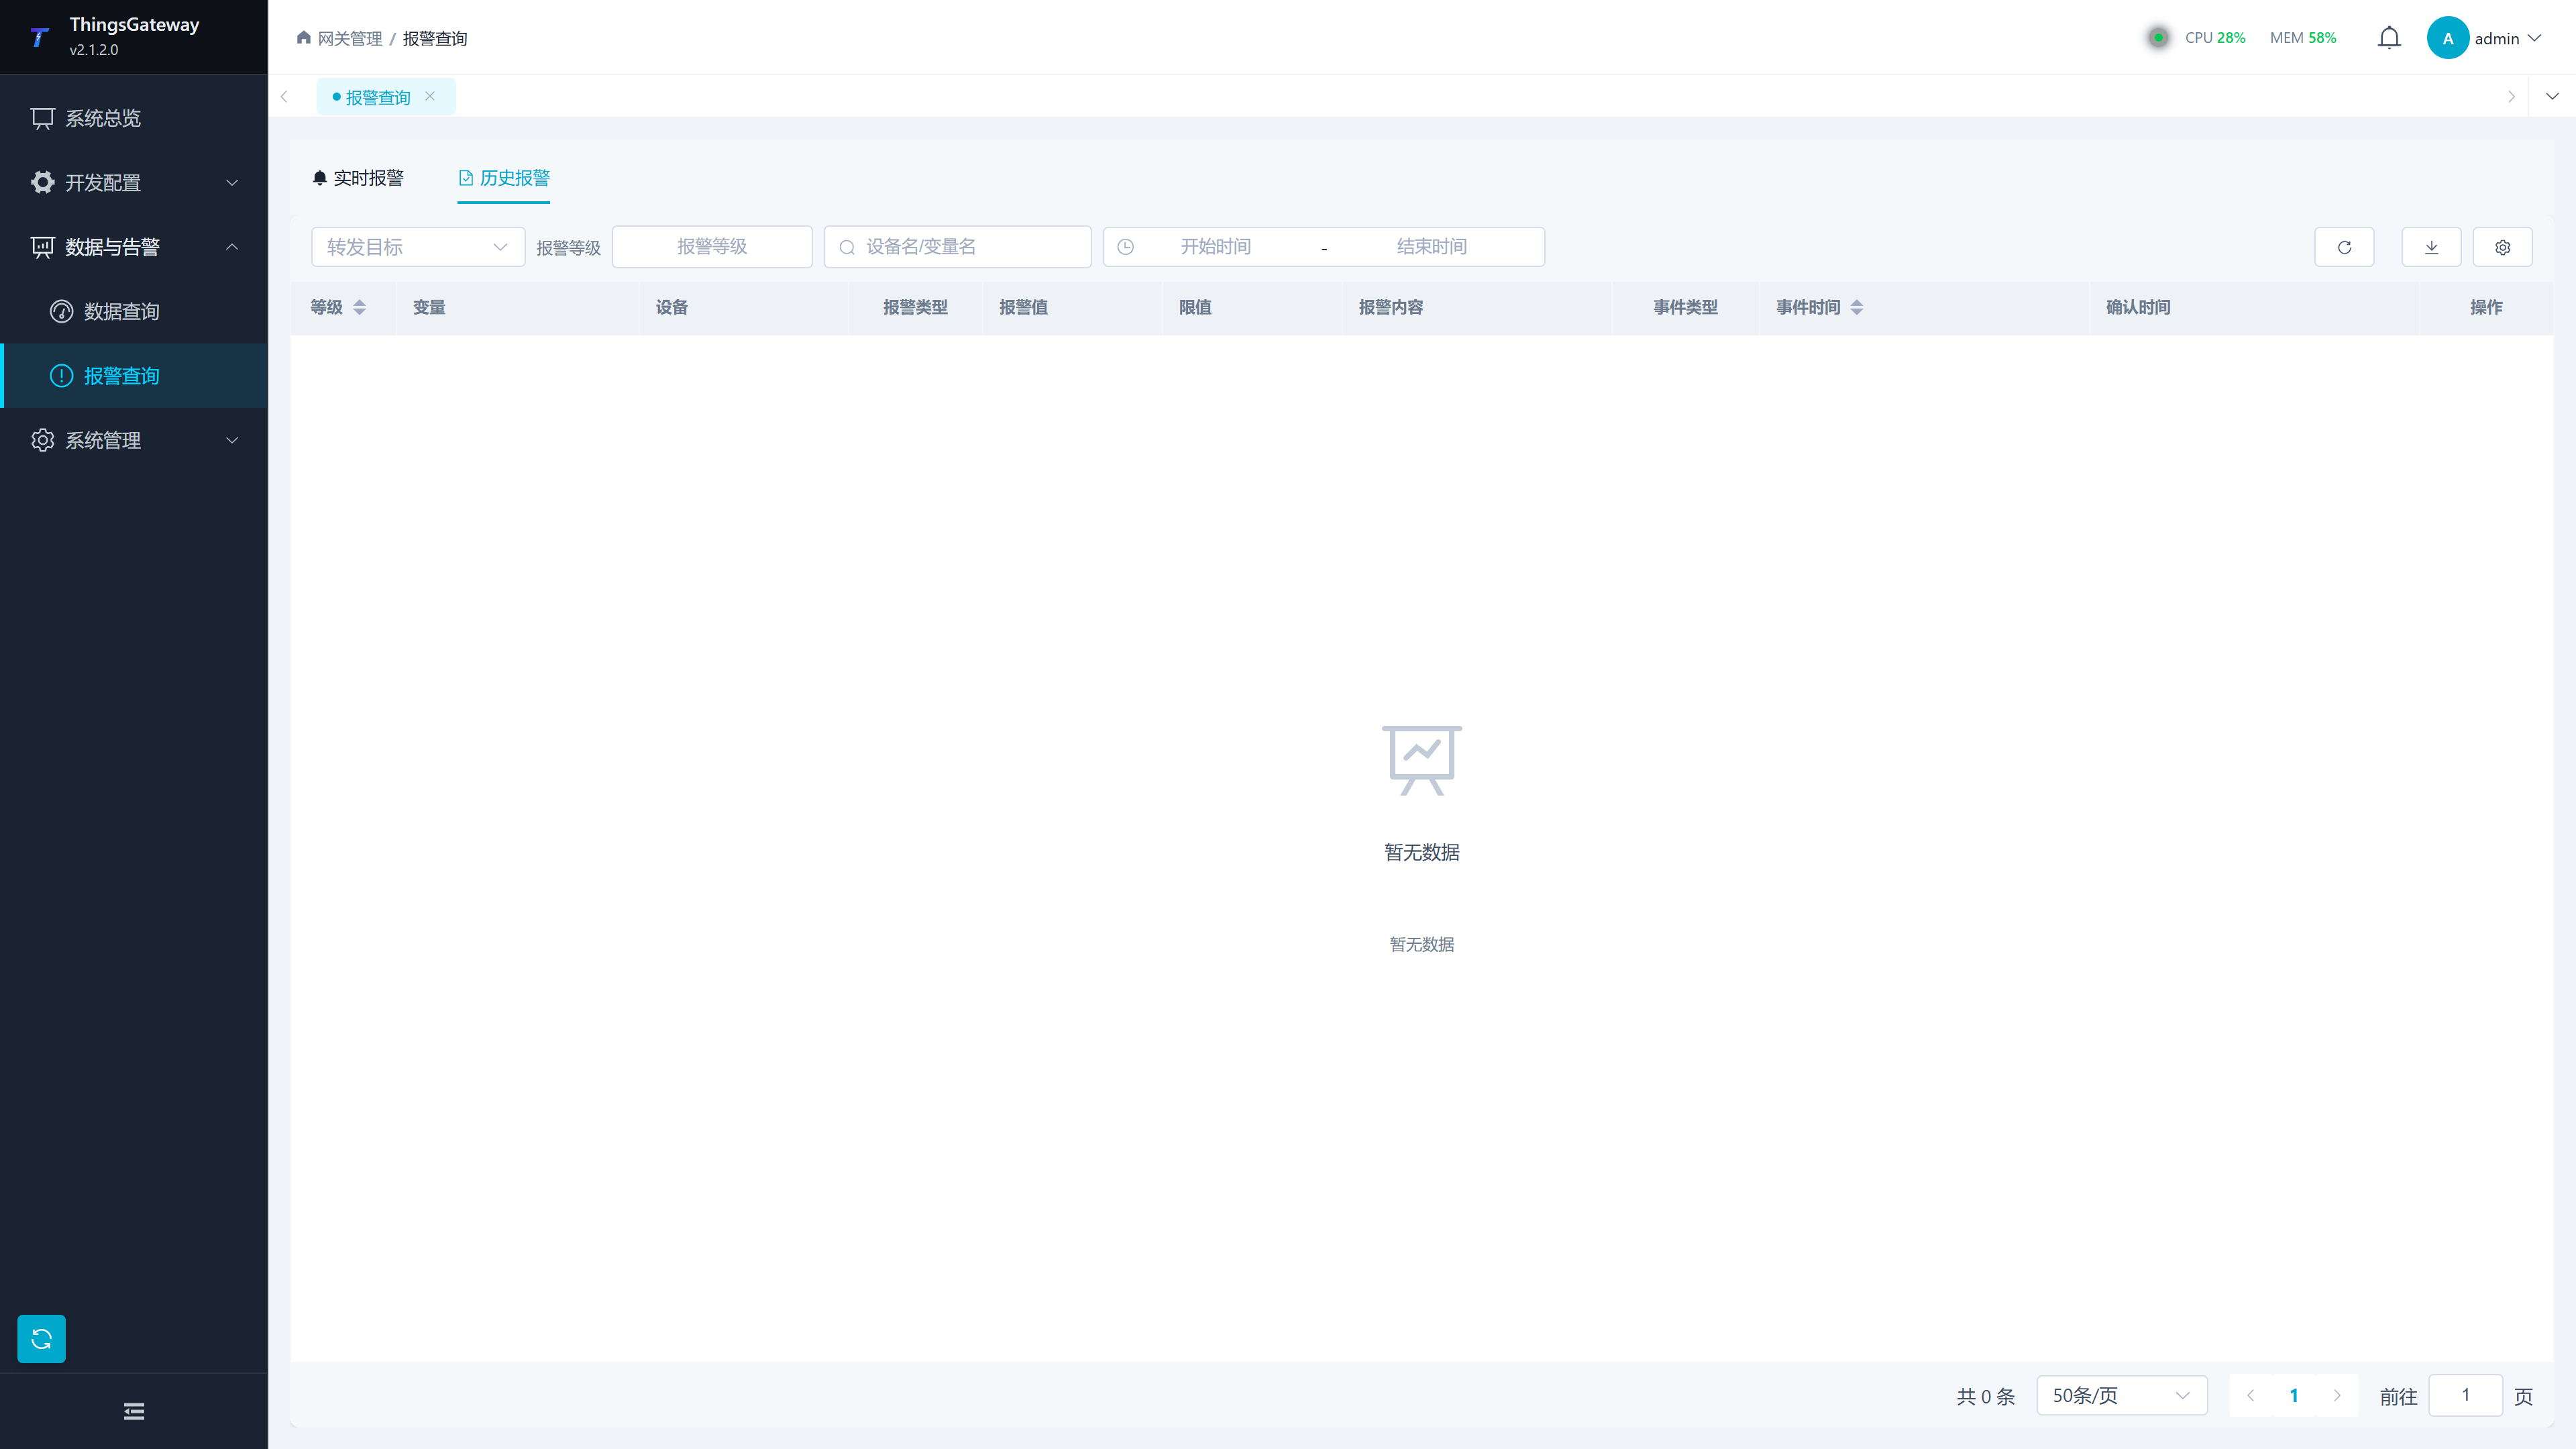
| Filter Items | Description |
|---|---|
| Forwarding Target | Select the historical alarm storage target, which is configured in the data forwarding process. |
| Alarm Level | Filter historical records by alarm level |
| Keywords | Search historical records by variable name, device name, or alarm text. |
| Time Range | Query by alarm or event record time |
| Export | Export the current query result as a file for offline analysis |
| Column settings | Customize historical alarm list display fields to keep only the required columns before export. |
Basic Information
| Information | Description |
|---|---|
| ID | Alarm Record ID |
| Variable Name | Alarm Variable Name |
| Device Name | Alarm Device |
| Description | Variable Description Information |
Alarm Information
| Information | Description |
|---|---|
| Alarm Level | Alarm Severity |
| Alarm Type | High/High/Low/Low/On/Off/Custom |
| Event Type | Alarm/Recovery (with color tags) |
| Alarm Value | Alarm Trigger Value |
| Alarm Limit | Alarm Threshold |
| Recovery Value | Variable Value at Recovery |
| Alarm Text | Alarm Description Text |
Variable Information
| Information | Description |
|---|---|
| Data Type | Variable Data Type |
| Register Address | Variable Address in Device |
Time Information
| Information | Description |
|---|---|
| Alarm Time | Alarm Occurrence Time |
| Event Time | Event Record Time |
| Recovery Time | Alarm Recovery Time |
| Confirmation Time | Alarm Confirmation Time; if not confirmed, display "Not Confirmed" |
Custom Fields
If a variable is configured with a custom note field, the custom field range will be displayed in the details:
| Field | Description |
|---|---|
| Note 1 | Custom Note 1 |
| Note 2 | Custom Note 2 |
| Note 3 | Custom Note 3 |
| Note 4 | Custom Note 4 |
| Note 5 | Custom Note 5 |
Custom fields are only displayed when the variable has the corresponding note.
Alarm Confirmation Operation
In the alarm details drawer, if the record is an unconfirmed alarm event, a "Confirm Alarm" button will appear at the bottom. Click it to enter the confirmation instructions and confirm the alarm.
Related Links
- System Overview - System Status Monitoring
- Collection Configuration - Channel, Device, Variable Configuration
- Rule Engine - Rule Stream Creation, Node Connection, and Runlog
- System Log - Log Query and Analysis