HyundaiTrackingMaster
Purpose
Hyundai robot UDP tracking status and position incremental control driver
Open the plugin
Enter "Development Configuration → Collection Configuration", create a device and select "HyundaiTrackingMaster" in "Collection Plugin".
Supported channels and data types
| Channel type | Pre-configuration check |
|---|---|
| UDP | Confirm the local binding address, port and firewall rules, and check the source of the packet. |
Optional data types: Boolean, String, Int32, Double
Plugin properties
Connection configuration
| Setting | Description |
|---|---|
| Robot source IP | Fill in: text input. Robot source IP; leave blank to accept any source |
Address rules
- tracking, source, command, state, count, x, y, z, rx, ry, rz
Special methods
| Method | Purpose | Parameters |
|---|---|---|
| ReadLatestFrameAsync | Read the latest tracking frame of modern robots | No parameters |
| WriteIncrementAsync | Send six-axis increments to modern robots | x,y,z=mm; rx,ry,rz=angle |
| WriteIncrementArrayAsync | Send modern robot increment array | values = six position and angle increments |
| SendFrameAsync | Send raw tracking frames to modern robots | data=strongly typed tracking data |
| MoveXAsync | Modern robot X-axis increment | value=mm |
| MoveYAsync | Modern robot Y-axis increment | value=mm |
| MoveZAsync | Modern robot Z-axis increment | value=mm |
| RotateXAsync | Modern robot X-axis rotation increment | value=angle |
| RotateYAsync | Modern robot Y-axis rotation increment | value=angle |
| RotateZAsync | Modern robot Z-axis rotation increment | value=angle |
Write, start/stop, reset, load, delete or control methods will change the status of field devices. Before execution, confirm that the equipment is in an operable state and prepare for stop or rollback measures.
Functions
| Function | Purpose |
|---|---|
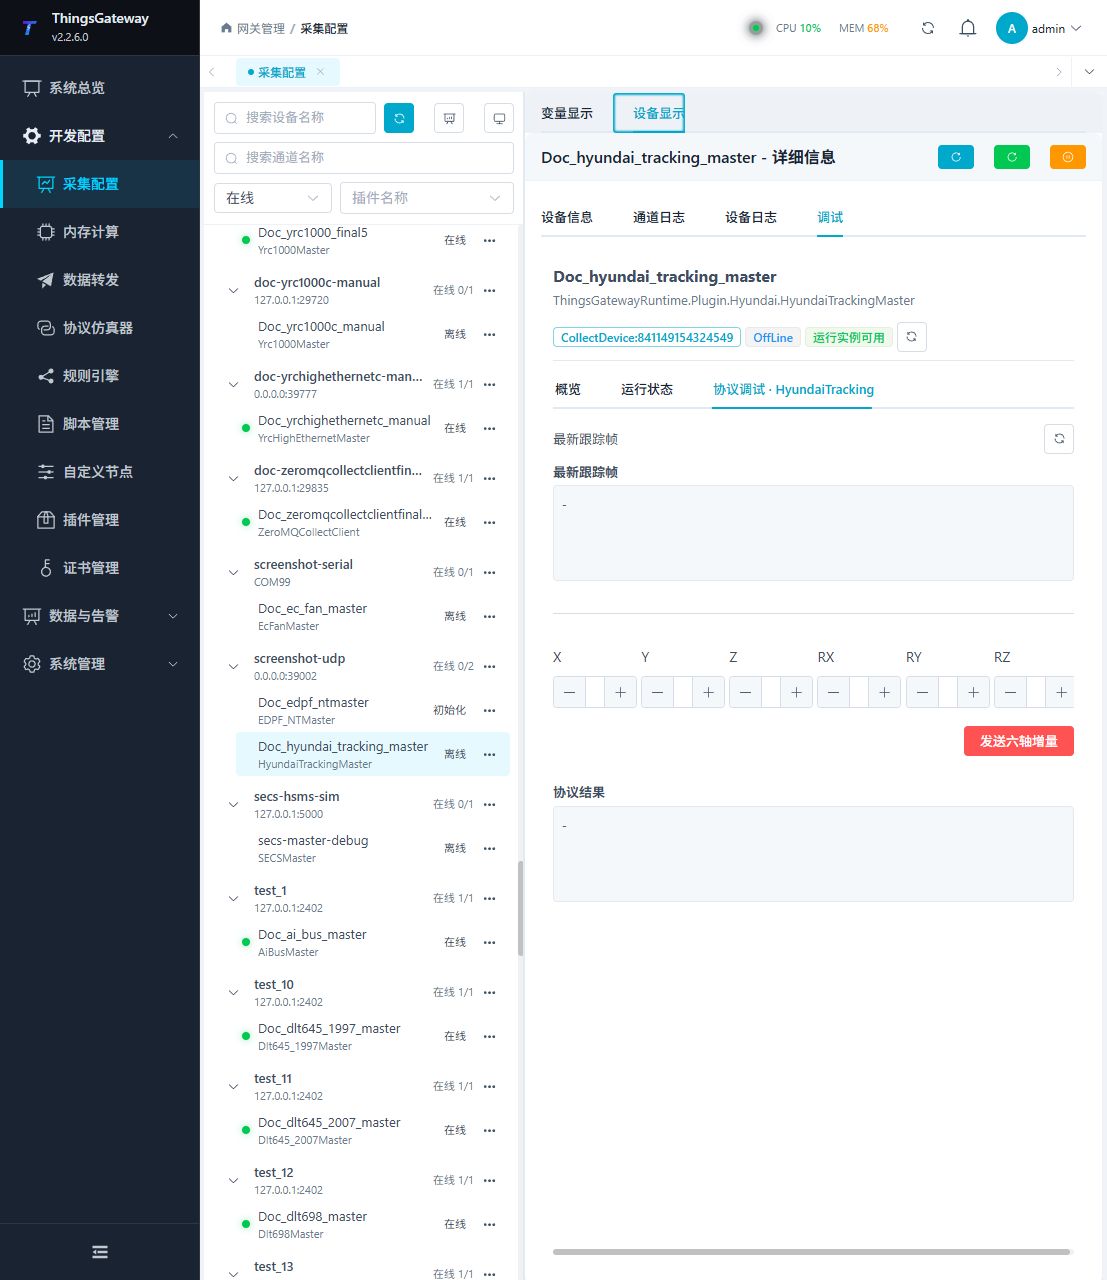
| Refresh trace frame | Use Refresh trace frame to send or inspect protocol frames and view the device or target response. |
| Send position delta | Use Send position delta with an approved test point and confirm site safety before execution. |
| Debug result | View the returned value, success state, or error message. |
Device debug
Enter "Development Configuration → Collection Configuration", select the current device and click "More Functions", then open "Debug".
Dedicated debugging page
Open Development Configuration → Collection Configuration, select the device, and open More Functions → Debug. The following image shows the plugin-specific debug page.
Debugging notes
Refresh the tracking frame first; writing X/Y/Z and Rx/Ry/Rz increments will affect the robot posture and must be confirmed twice before execution.
Verify the configuration
- Use the plugin-specific debug panel with one confirmed test point or test message.
- Confirm that the returned value or received message matches the device point list.
- Perform writes or control operations only with an approved test point and the site safety procedure.
Troubleshooting
- The debug panel shows no result: Check the required inputs and plugin parameters, then inspect the device or target log for a response or error.
- Special method execution fails: Check method parameters and permissions; control, write or reset methods also need to confirm that the device is in a state that allows operation.
Related links
- Collection configuration: View channel, device and common variable configuration.
- Plugin Index: Find other collection or data-forward plugins.