On this page
Certificate Management
The center and edge workflow can deploy SyncBridge / Gateway MQTT data certificates automatically. This page stores plugin certificates; it does not enable HTTPS for Gateway Web. Studio and Watchdog maintain their management identities separately.
Open Development Configuration → Certificate Management. Upload an existing certificate, or generate a CA and then a server or client certificate for an internal test.
Upload a certificate for a connection
- Click Add → Upload Certificate and enter a recognizable name.
- Select the purpose: CA to trust a peer’s issuer, Server for an identity presented by a gateway server plugin, or Client for the gateway’s identity when an external service requires mutual authentication.
- Select the actual file format and upload the file. Enter the PFX password where required; for PEM with a separate private key, upload that key and enter its password.
- Save and check the certificate name, purpose, and validity in the list.
- Edit the device or forwarding target that requires TLS. Select the saved name in its CA, server-certificate, or client-certificate field, then save that connection.
- Check the connection result. Uploading a certificate does not assign it to a connection automatically.
Keep private keys and passwords out of screenshots and support requests. Establish the correct trust relationship instead of allowing untrusted certificates.
Choose and locate a certificate
First, look at the terminology
| terminology | On-site understanding |
|---|---|
| CA certificate | A root or intermediate certificate used to verify an issuer. Issuing new certificates also requires the CA’s private key. |
| Server certificate | Identity presented by a server plugin, such as MQTT Server or OPC UA Server. |
| Client certificate | Identity presented by the gateway when an external system requires mutual TLS authentication. |
| TLS / SSL | encrypted communication methods. Once enabled, both parties in the connection use certificates to confirm their identities and encrypt the transmitted content. |
| PFX / PEM / CER / DER | certificate file formats. PFX typically includes both the certificate and the private key; PEM is commonly found in Linux; CER/DER are mostly certificate public key files. |
| Private Key | Sensitive key corresponding to the certificate. After a private key is leaked, the other party may impersonate the gateway or client. |
| Subject / SAN | Subject is the name of the certificate subject; SAN is a list of domain names or IPs permitted by the certificate. When accessing services via IP, write the IP into the SAN. |
Function Entry
After logging into TGateway Web, click the “Development Configuration → Certificate Management” menu on the left.
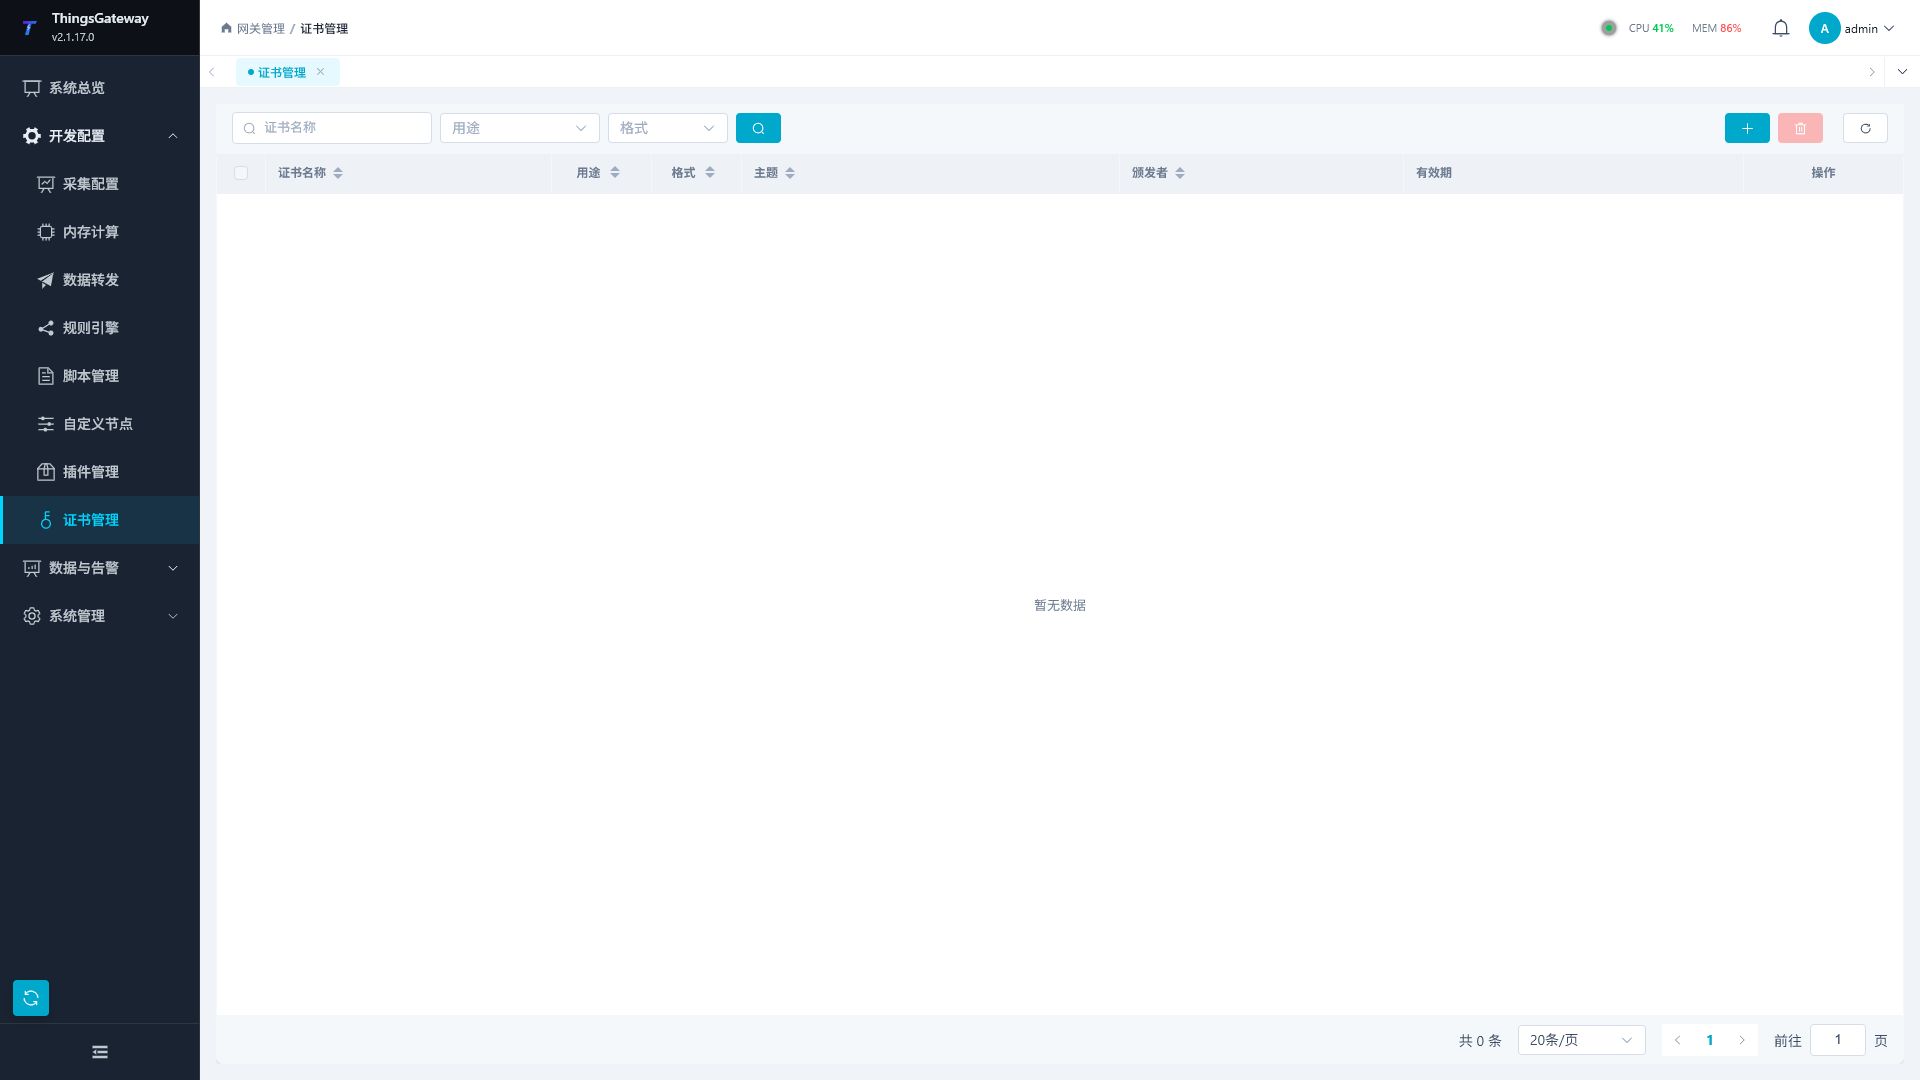
Certificate List
| Columns | Description |
|---|---|
| Certificate Name | Certificate Identifier Name |
| Purpose | CA Certificate/Server/Client |
| Format | PFX/PEM/CER/DER |
| Subject | Certificate Subject Name |
| Issuer | Certificate Issuer |
| Validity Period | Certificate Validity Period |
Certificate Purpose
| Purpose | Description |
|---|---|
| CA Certificate | Root certificate or intermediate certificate, Used for issuing server certificates and client certificates, and can also be used to verify peer certificates. Before generating server or client certificates, CA certificates should be created or uploaded first. |
| Server | Identity presented by a server plugin, such as MQTT Server or OPC UA Server; connecting clients verify it. |
| Client | gateways are used when clients connect to external systems, such as MQTT Client bidirectional TLS or scenarios where external systems require client certificate authentication. |
Certificate Filtering
The page supports filtering certificates by the following criteria:
| Filter Criteria | Description |
|---|---|
| Certificate Name | Search by Name Keywords |
| Purpose | Filter by CA/Server/Client |
| Format | Filter by PFX/PEM/CER/DER |
Operation Functions
| Functions | Description |
|---|---|
| Upload certificates | Upload existing certificate files |
| Generate CA certificates | Generate new CA root certificates |
| Generate server certificates | Issue server-side certificates based on existing CA certificates |
| Generate client certificates | Issue client certificates based on existing CA certificates |
| Edit | Edit certificate information |
| Export | Export certificate files |
| Delete | Delete certificates |
| Batch delete | Batch delete Select certificates |
| Refresh | Refresh certificate list |
Upload or generate certificates
Upload certificate
Click “Add → Upload certificate” to open the upload dialog box:
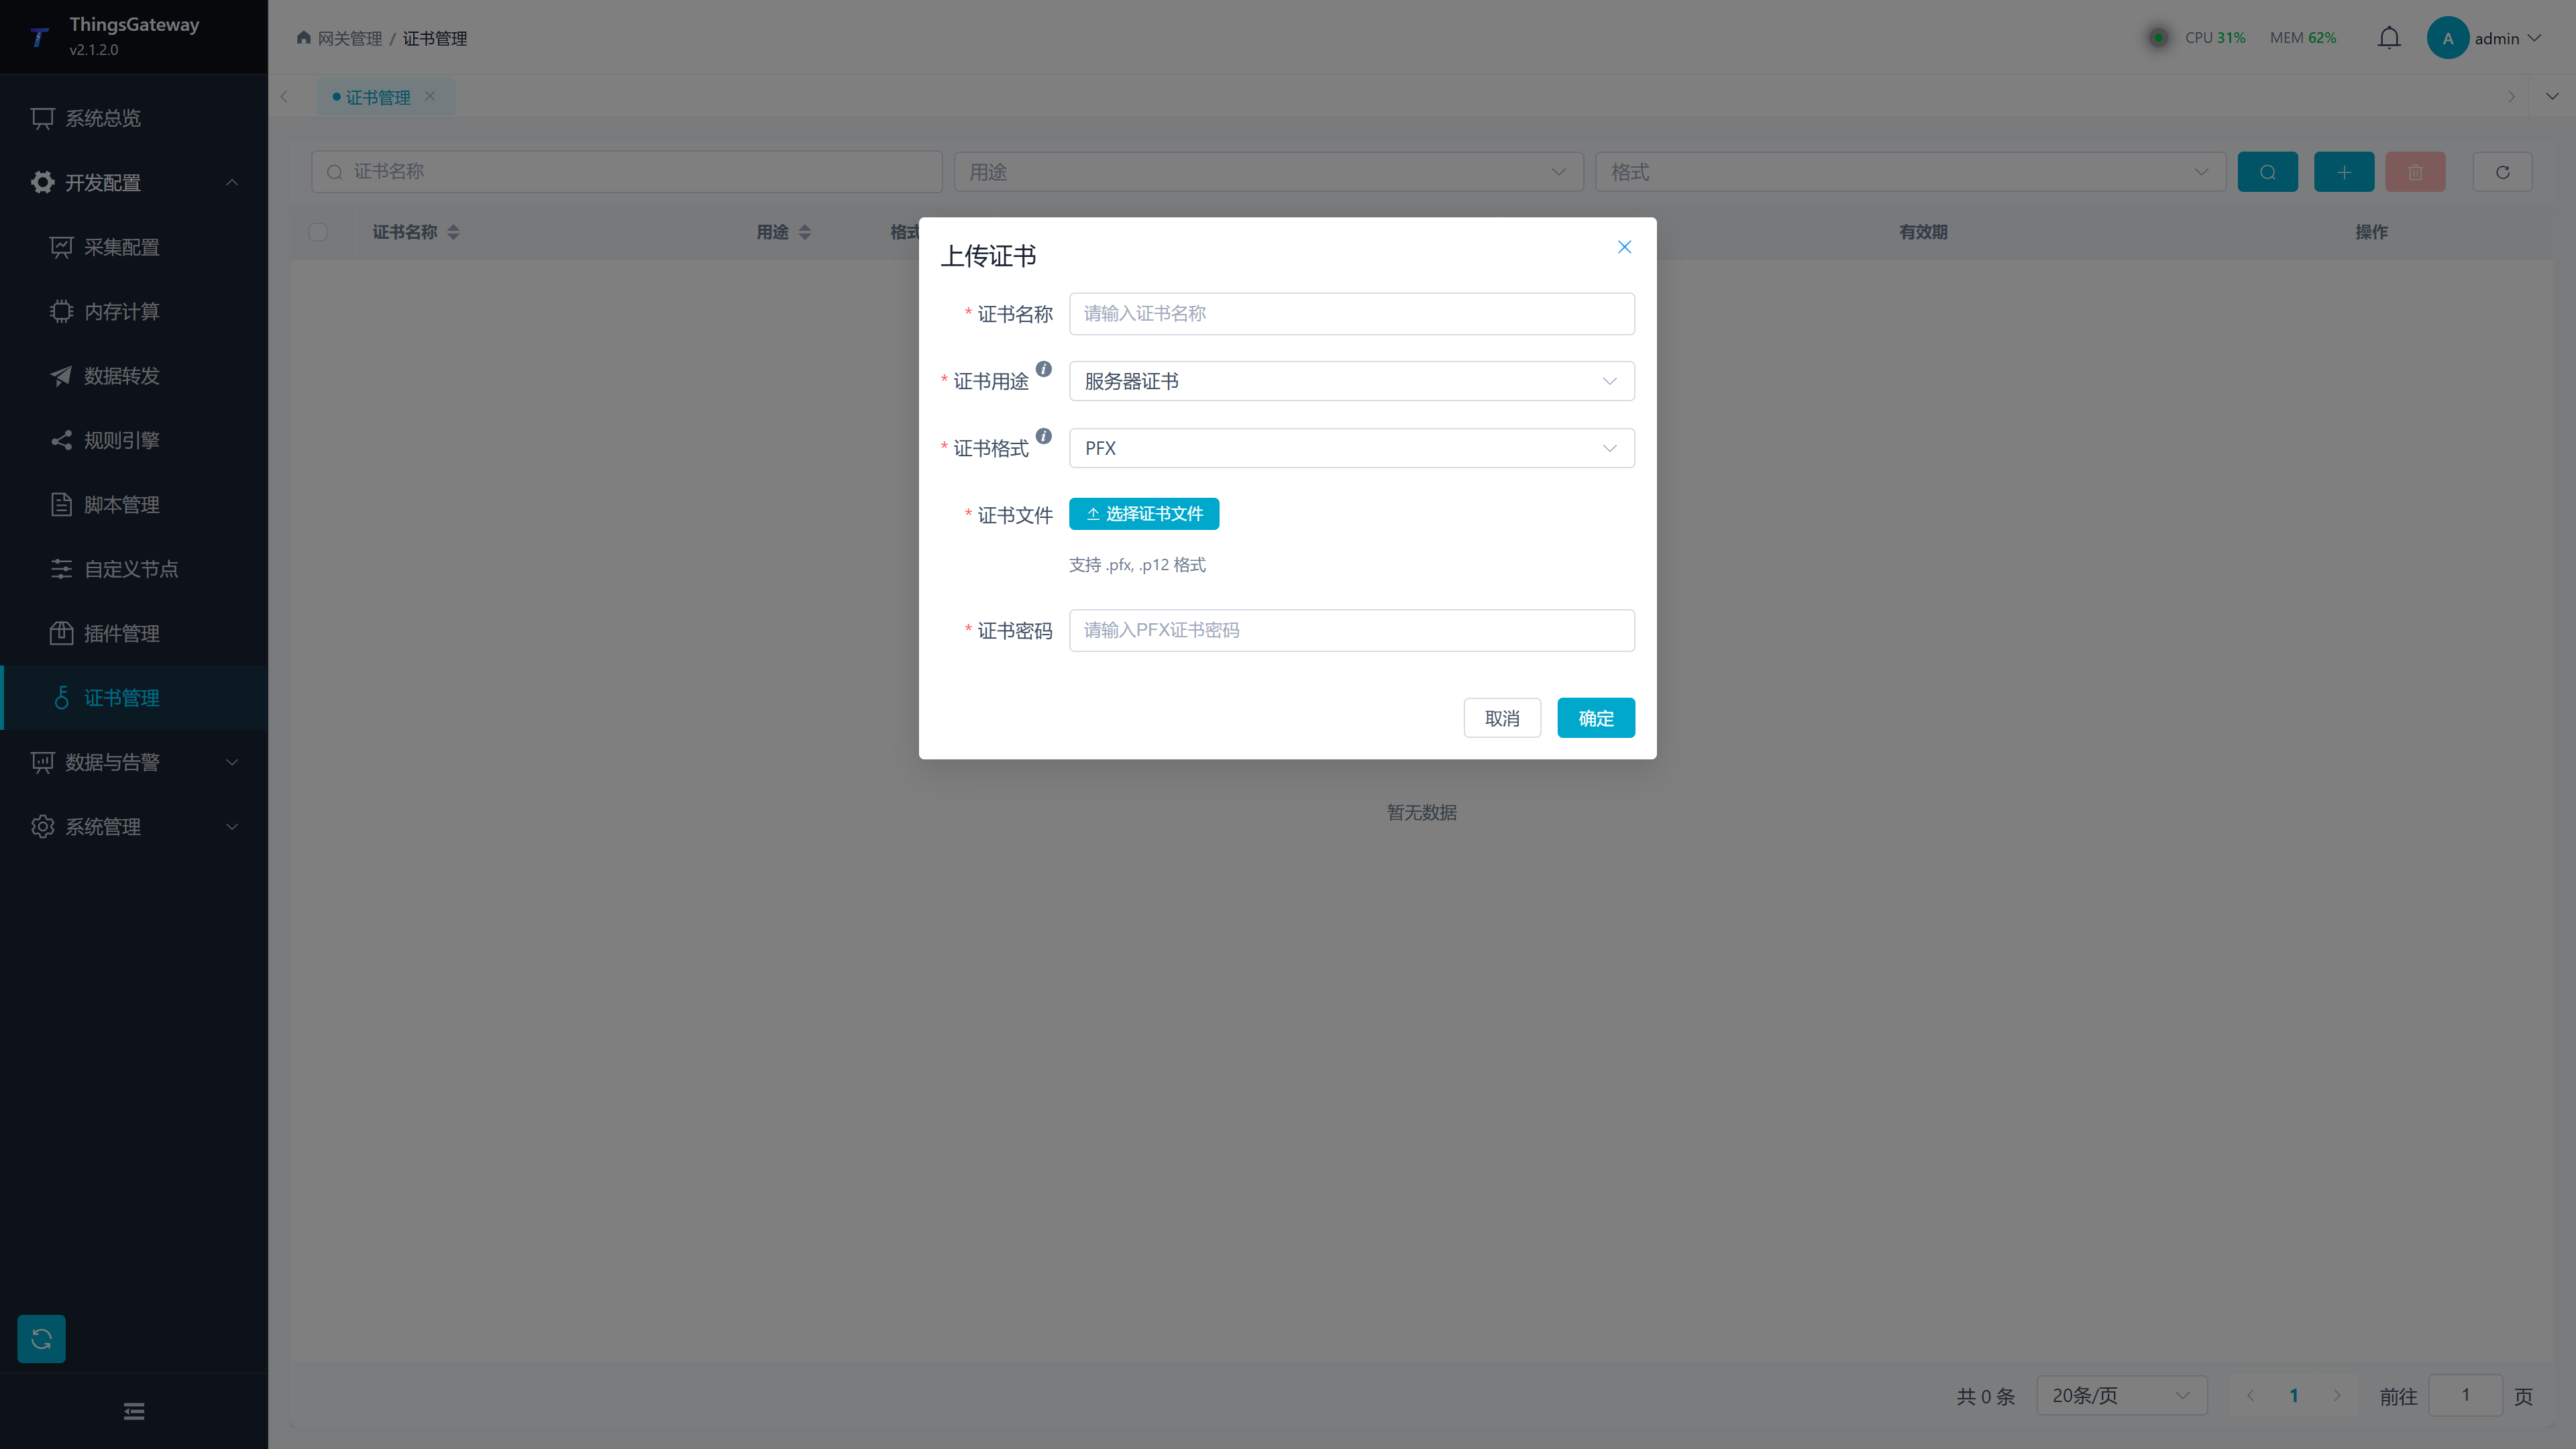
Configuration Item
| Field | Description |
|---|---|
| Certificate Name | Certificate Identifier Name |
| Certificate Purpose | CA/Server/Client |
| Certificate Format | PFX/PEM/CER/DER. PFX: Binary format with private key (commonly used on Windows); PEM: Base64 text format (commonly used in Linux); CER/DER: Certificate format for public key only |
| Certificate file | certificate file |
| Private key file | Private key file (PEM format) |
| certificate password | PFX certificate password, or the password used to protect private keys when generating or exporting certificates. |
| Private Key Password | Enter when the PEM private key file is protected by a password. |
Generate CA Certificate
Click “Add → Generate CA Certificate” to open the Generation dialog box. CA certificates are used for subsequent issuance of server and client certificates. It is recommended to clearly use a name to indicate the certificate’s purpose and field scope.
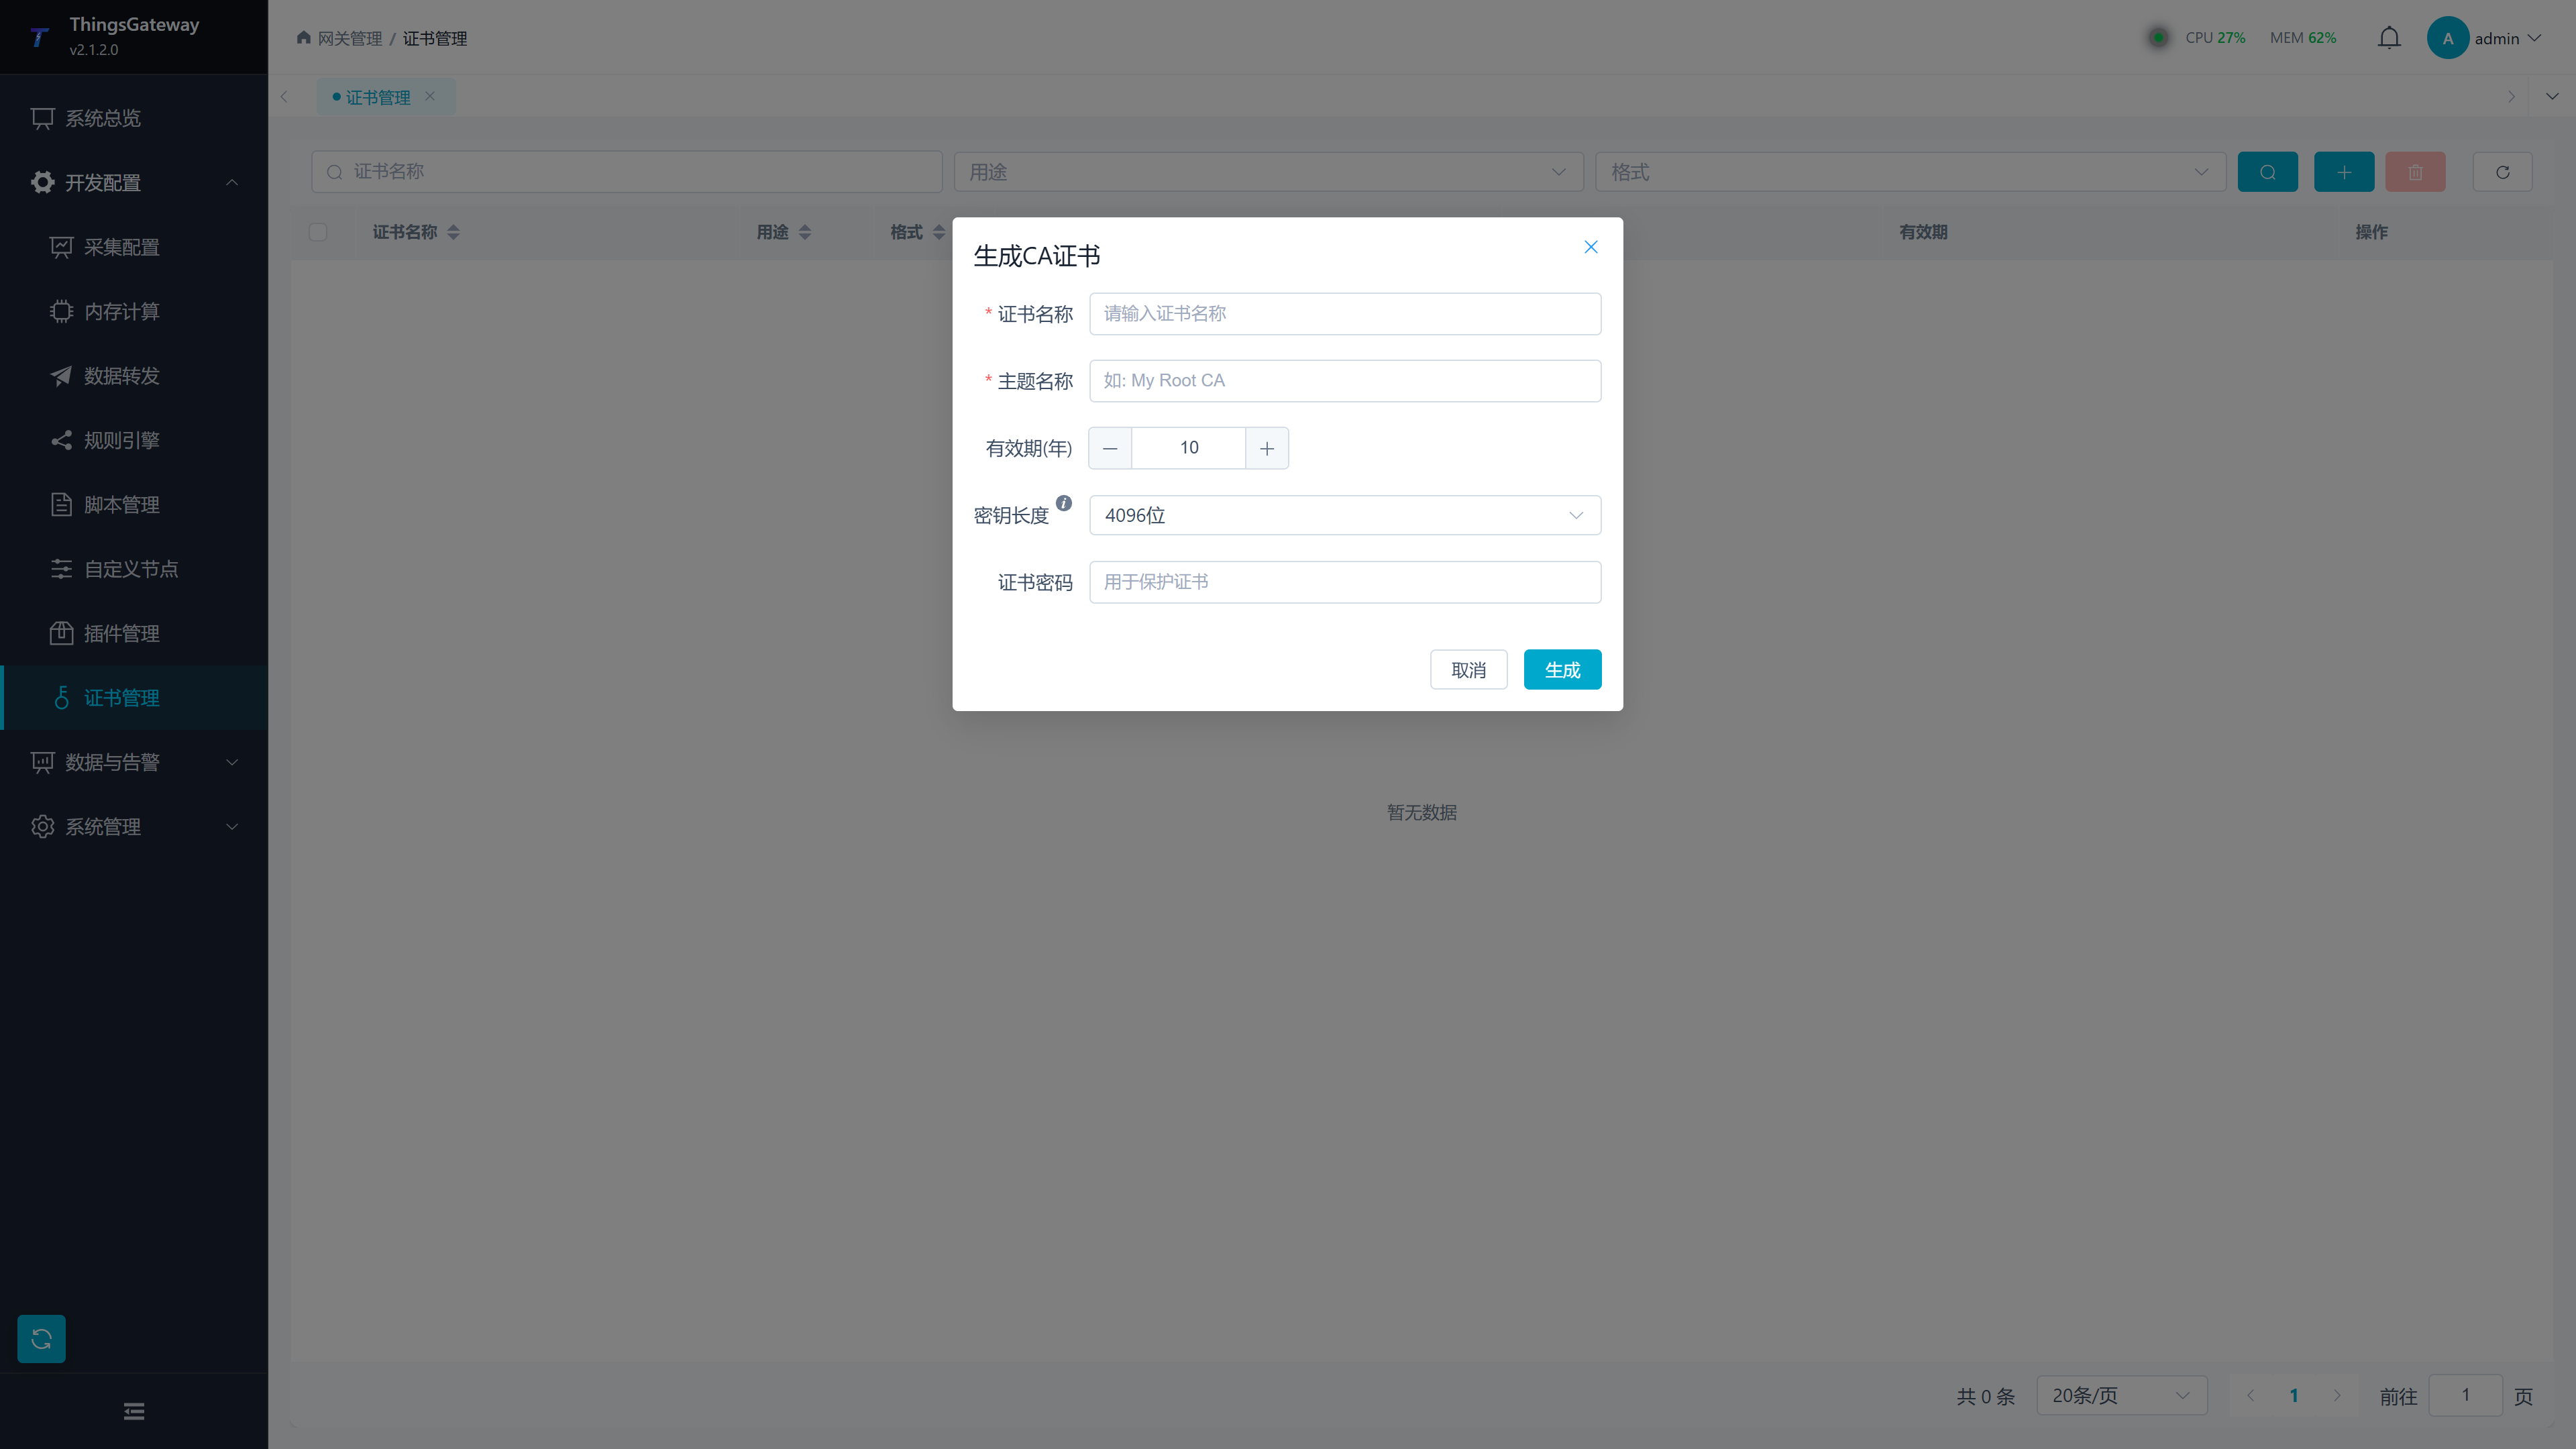
Configuration Items
| Fields | Descriptions |
|---|---|
| Certificate Name | The unique name of the certificate in the system; select this name when configuring the CA certificate later. |
| Subject | Certificate Subject, usually filled in CA name, organization name, or field root certificate name. |
| Validity Period | Certificate validity period, unit: years, interface limit 1 to 50. |
| Key length | selectable between 2048 bits or 4096 bits; CA certificates are recommended to use 4096 bits. |
| Certificate and password | optional. After filling it out, it is recommended to protect the private key used to generate the certificate; it is recommended to set up and properly store it in the production environment. |
Generate Server Certificate
Click “Add → Generate Server Certificate” to open the Generation Dialog:
The server certificate must be issued by an existing CA certificate. If the CA certificate list is empty, first execute “Generate CA Certificate” or “Upload Certificate,” then reopen the server certificate generation popup.
Configuration Items
| Fields | Description |
|---|---|
| Certificate Name | Unique name referenced by server plugins such as OPC UA Server and MQTT Server. |
| Subject Name | Certificate Subject, usually filled in as the service domain name, device name, or site name. |
| CA Certificate | The CA certificate used to issue the server certificate. The dropdown option comes from certificates listed for CA purposes. |
| SAN domain name | List of subject alternate domain names. After entering the domain name, press Enter to add; multiple domains are supported. |
| SAN IP address | subject alternate name IP address list. When accessing services via IP, you must provide the corresponding IP. |
| Validity Period | Certificate validity period, unit: years, interface limited to 1 to 10. |
| Key length | can be selected between 2048 bits or 4096 bits. |
| Certificate password | optional. It is used to protect the private key or export file that generates the certificate. |
SAN Configuration Description
SAN (Subject Alternative Name) is an extension field of the certificate, used to specify the valid domain name and IP address of the certificate. After configuring the SAN, the certificate can support access to multiple domain names and IP addresses.
Usage Scenario:
- The server has multiple domain names that need access.
- The server has multiple IP addresses that need access.
- Internal network environment uses IP addresses to access
Operation Method:
- Enter the domain name or IP in the input box After the address, press Enter to add.
- The same certificate can be configured for multiple SAN domains and multiple SAN IP addresses simultaneously.
- If the client accesses the service via an IP address, entering only the subject name is usually insufficient; the SAN IP address should also be provided.
Generate Client Certificate
Click “Add → Generate Client Certificate” to open the Generation Dialog Box:
Client Certificate is used for two-way authentication scenarios, For example, OPC UA client certificates, MQTT client certificates, or other external systems that require mTLS. You also need to prepare a CA certificate before generation.
Configuration Items
| Fields | Description |
|---|---|
| Certificate Name | The unique name of the client certificate within the system. |
| Subject Name | Client Identity Name, which can be filled in the client application name, device name, or external system identifier. |
| CA Certificate | The CA certificate used to issue the client certificate. |
| Validity Period | Certificate validity period, unit: years, interface limit 1 to 10. |
| Key length | selectable between 2048 or 4096 bits. |
| Certificate Password | Optional. Used to protect the client certificate private key. |
Export Certificate
Click the “Export” button in the certificate list to open the export dialog:
Export Configuration
| Fields | Description |
|---|---|
| Export Formats | PEM/PFX/CER/DER |
| Includes private key | Displayed only in PEM format. After opening, the exported content contains the private key, making it suitable for migrating to other gateways or clients. |
| Export password | optional. Fill in when exporting PFX or when you need to protect your private key. |
Export Format Instructions
| Format | Instructions |
|---|---|
| PEM | Base64 encoded text format, commonly used in Linux systems |
| PFX | binary format, containing certificates and private keys, commonly used in Windows systems |
| CER | binary format, containing only certificates |
| DER | binary format, containing only certificates |
Export results
After successful export, certificate details and export content will be displayed:
| Content | Description |
|---|---|
| Certificate (PEM) | PEM format certificate content, supports copying and downloading |
| Private Key (PEM) | PEM format private key content, supports copying and downloading |
| PFX files | Binary file download in PFX format |
| CER content | certificate content in CER format |
| DER file | Binary file download in DER format |
Export Note
PEM or PFX files containing private keys should be managed as sensitive files. After exporting, do not send via regular chat tools, public cloud drives, or unencrypted emails; The certificate password should be stored separately from the certificate file.
Save and verify
- Refresh the certificate list and check the name, purpose, issuer, and validity.
- Select the certificate in the consuming plugin or service and save its configuration.
- Start that connection and complete a TLS handshake. Check both the server and client result.
- For a private CA, confirm the expected issuer is trusted. If revocation checking is enabled, the runtime must be able to complete it.
A saved certificate is not proof of a successful handshake. The certificate must be valid, match its purpose, and have an accessible private key where the connection requires one.
Troubleshooting
| Symptom | Action |
|---|---|
| Uploaded certificate is missing | Clear filters and refresh. Check the unique name, file format, and password. |
| TLS handshake fails | Check purpose, validity, target hostname, the complete chain, and both system clocks. |
| Client certificate is rejected | Check the server’s trusted CA, the client certificate issuer, and any fingerprint restrictions. |
| Exported file cannot be used | Check format, private-key inclusion, and export password. A public-only CER/DER file cannot replace a client identity’s private key. |
Related Links
- System Settings - Gateway System Configuration
- Plugin Management - Plugin Enable and Disable